In this tutorial, we will show you how run your own JMeter scripts on the Neocortix platform.
This is an advanced tutorial. We assume that you have already completed the
Basic JMeter tutorial.
We also recommend that you review the
JMeter Advanced tutorial, and familiarize yourself with the JPetStore and JImageUpload examples.
Preparing Your JMeter Script
We assume that you have an existing JMeter script
YourScript.jmx
that you are already using professionally, and running it on conventional On-Premises or Cloud instances, likely on a high-performance server with many cores and a lot of memory, with many Virtual Users. We will show you how to modify YourScript.jmx
so that you can run it on many small Neocortix instances, rather than on one huge conventional server.
The key idea is to modify
YourScript.jmx
so that it has at most 20 Virtual Users active at any time, and then you will need more instances to achieve the desired load. For example, if your YourScript.jmx
has 4000 Virtual Users active at its peak, you will modify it to have only 20 Virtual Users active, and use 200 Neocortix instances to achieve the desired load.
Please create
YourModifiedScript.jmx
so that it has at most 20 Virtual Users active at any time, and make a note of the number of instances you will need to achieve your desired Load.
Please note that the Output File Name for the View Results Tree method should be set to
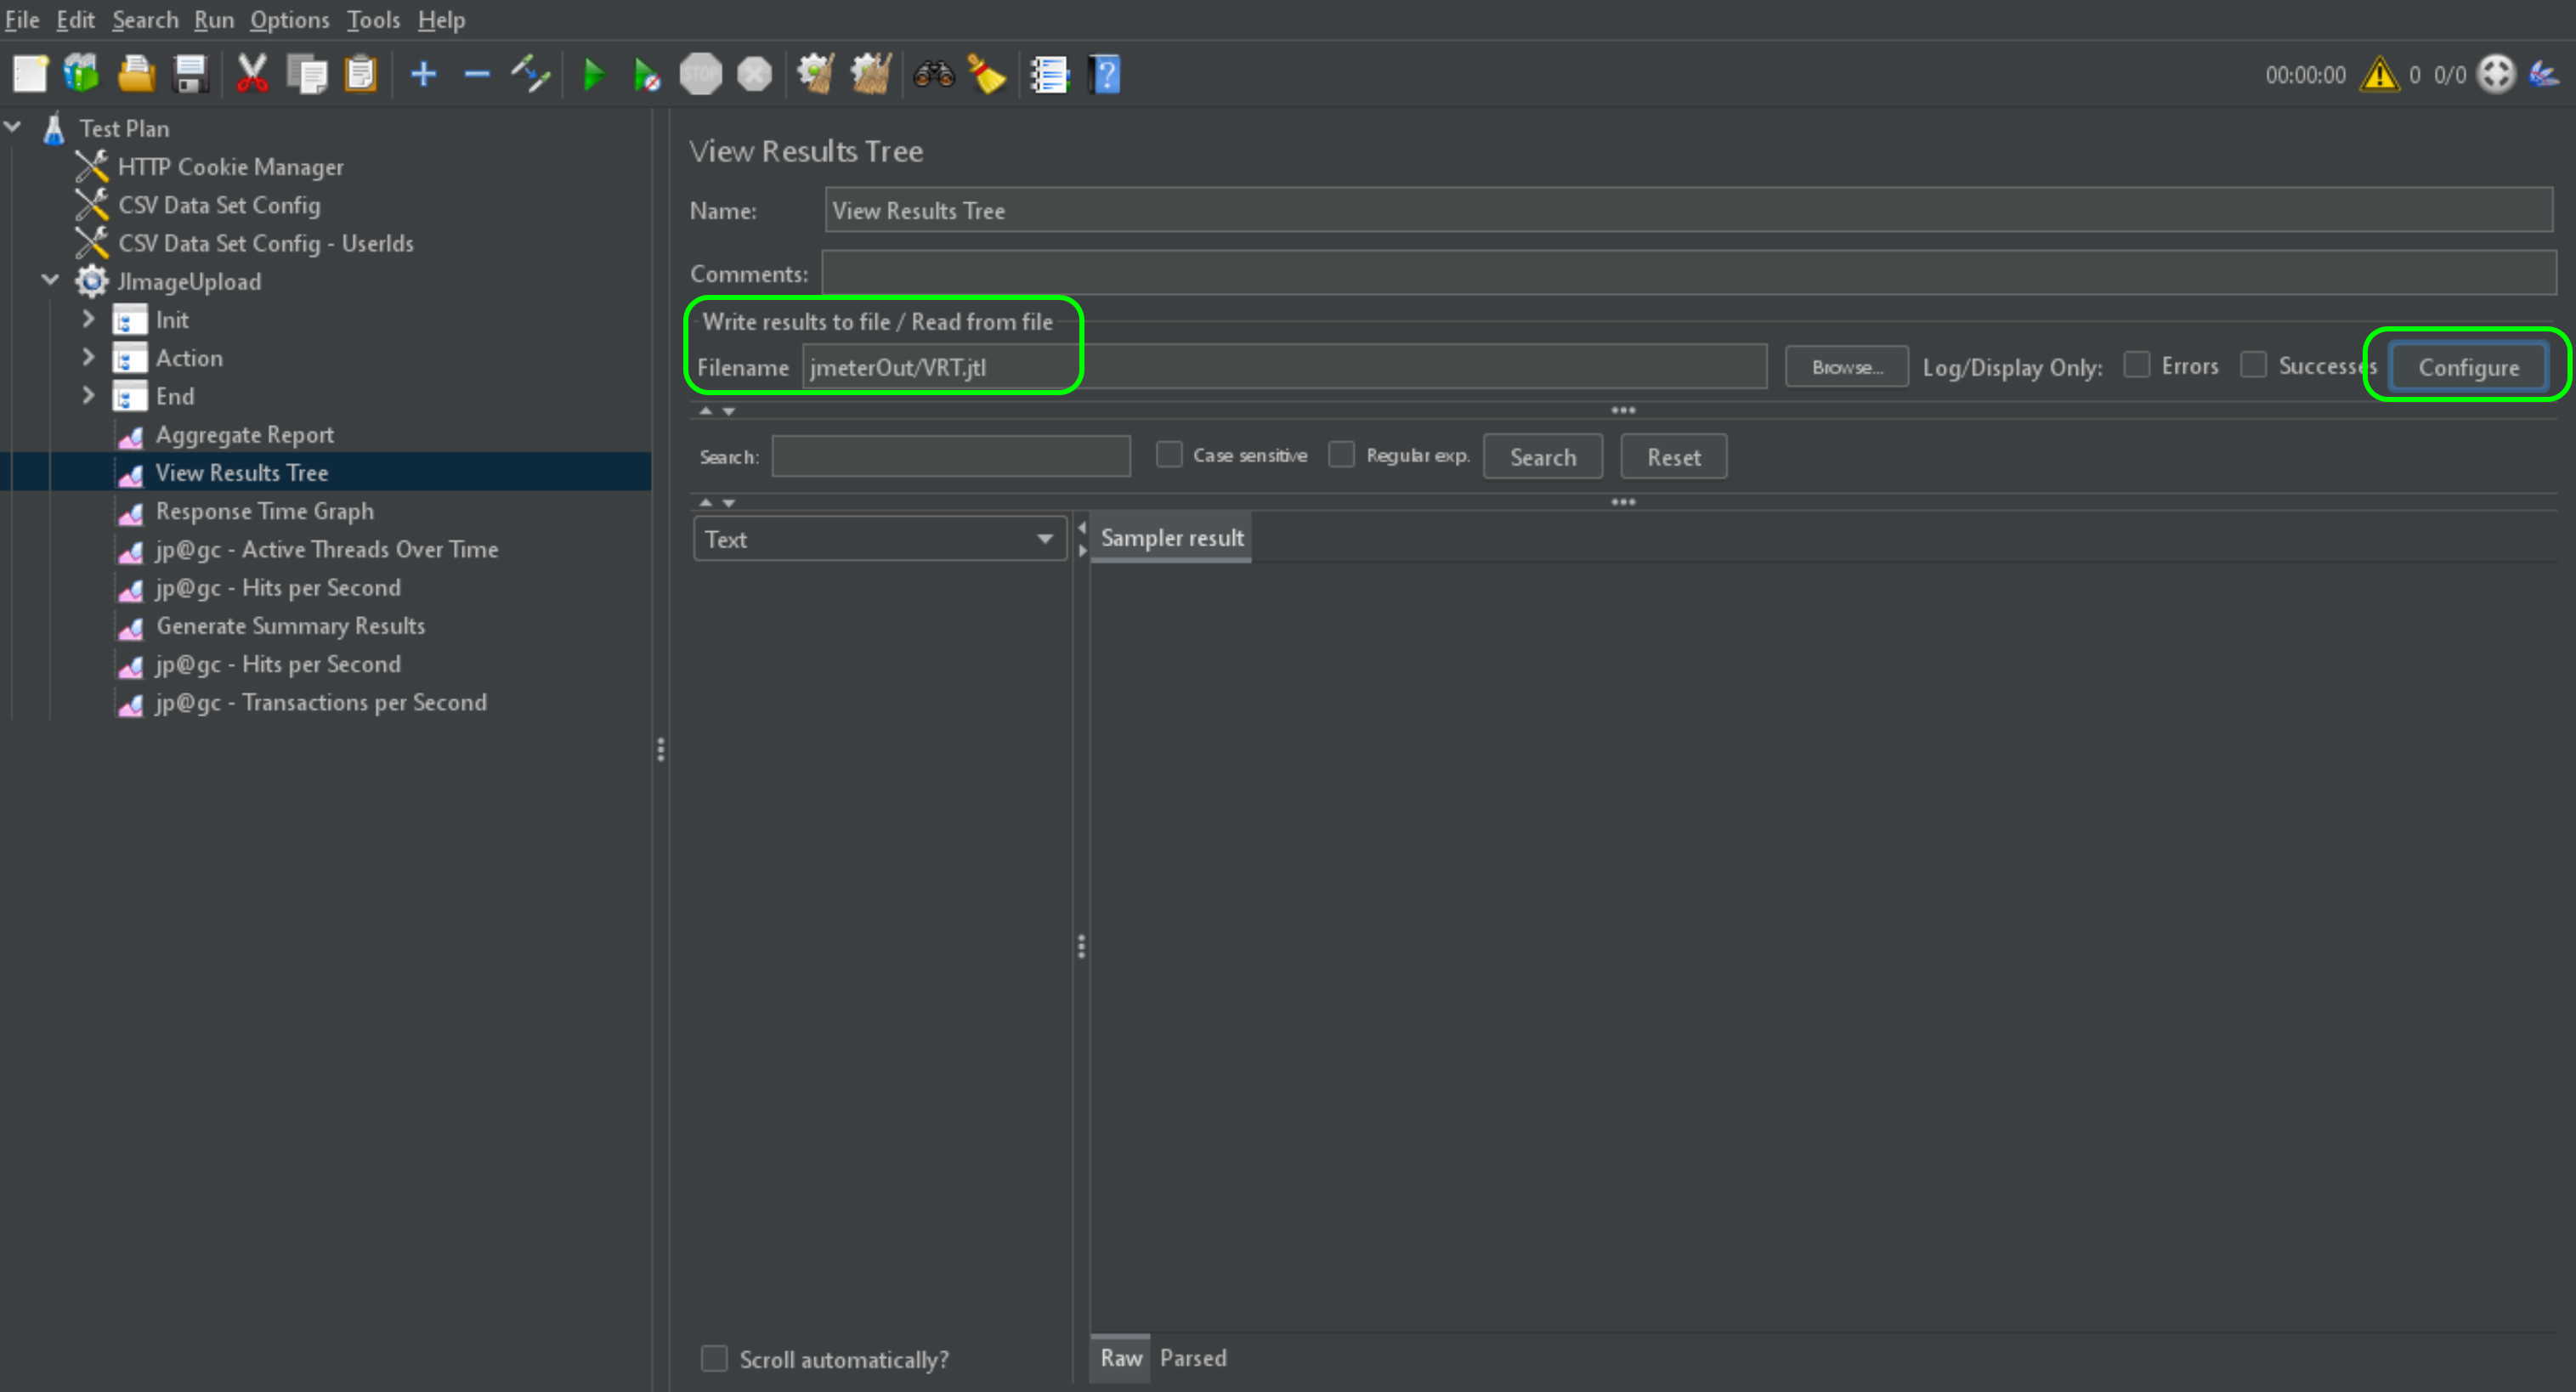
jmeterOut/VRT.jtl
as shown here:
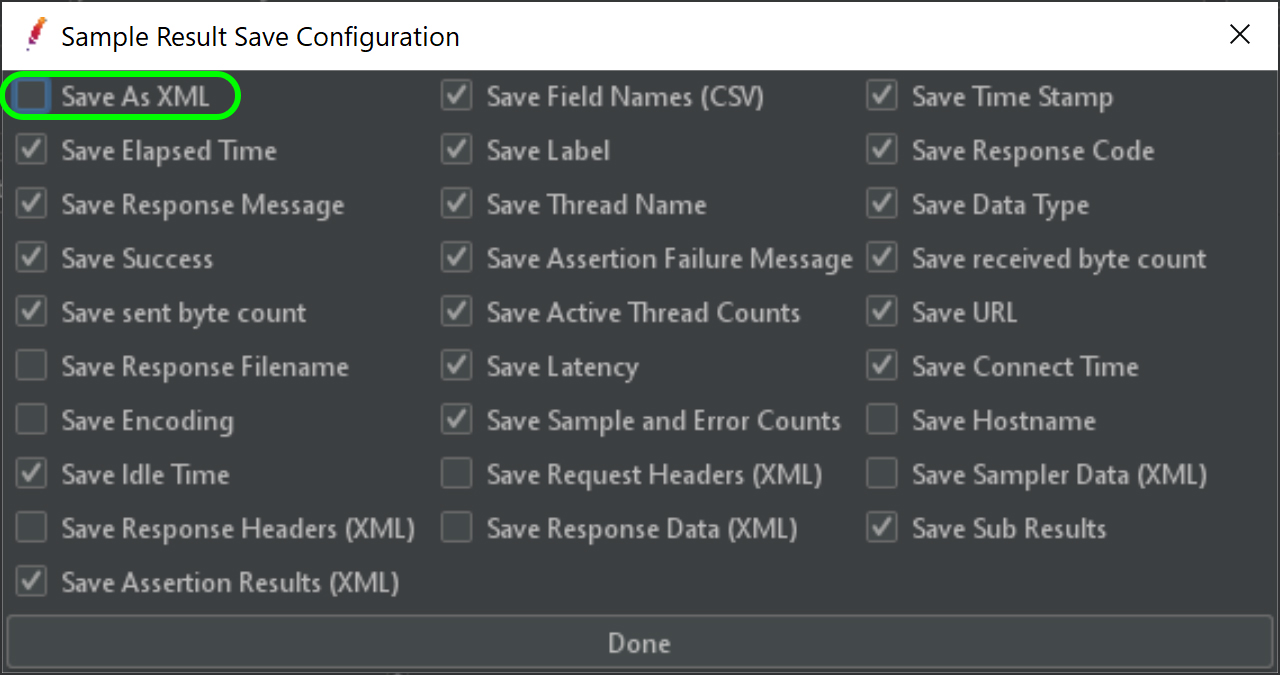
Please note also that the “Save as XML” checkbox should be unchecked in the JMeter Sample Result Save Configuration popup, so that the .jtl files will be in the right format, as shown here:
And then, finally, you will need to put
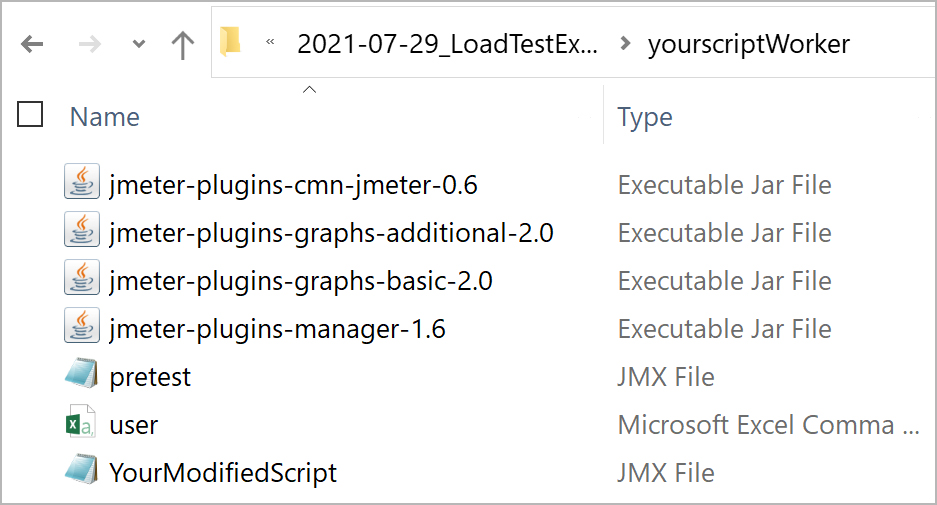
YourModifiedScript.jmx
into a directory, like yourscriptWorker
, so that you can submit the directory to the Neocortix LoadTest tool. And you will also have to copy any other files into that directory that your script may need, like plugin .jar files, user.csv files, etc. Below we are showing the supporting files from the JPetStore example in the
JMeter Advanced tutorial:
Running A Small Example of Your Script
Please go to the LoadTest dashboard at
https://cloud.neocortix.com/load-test:
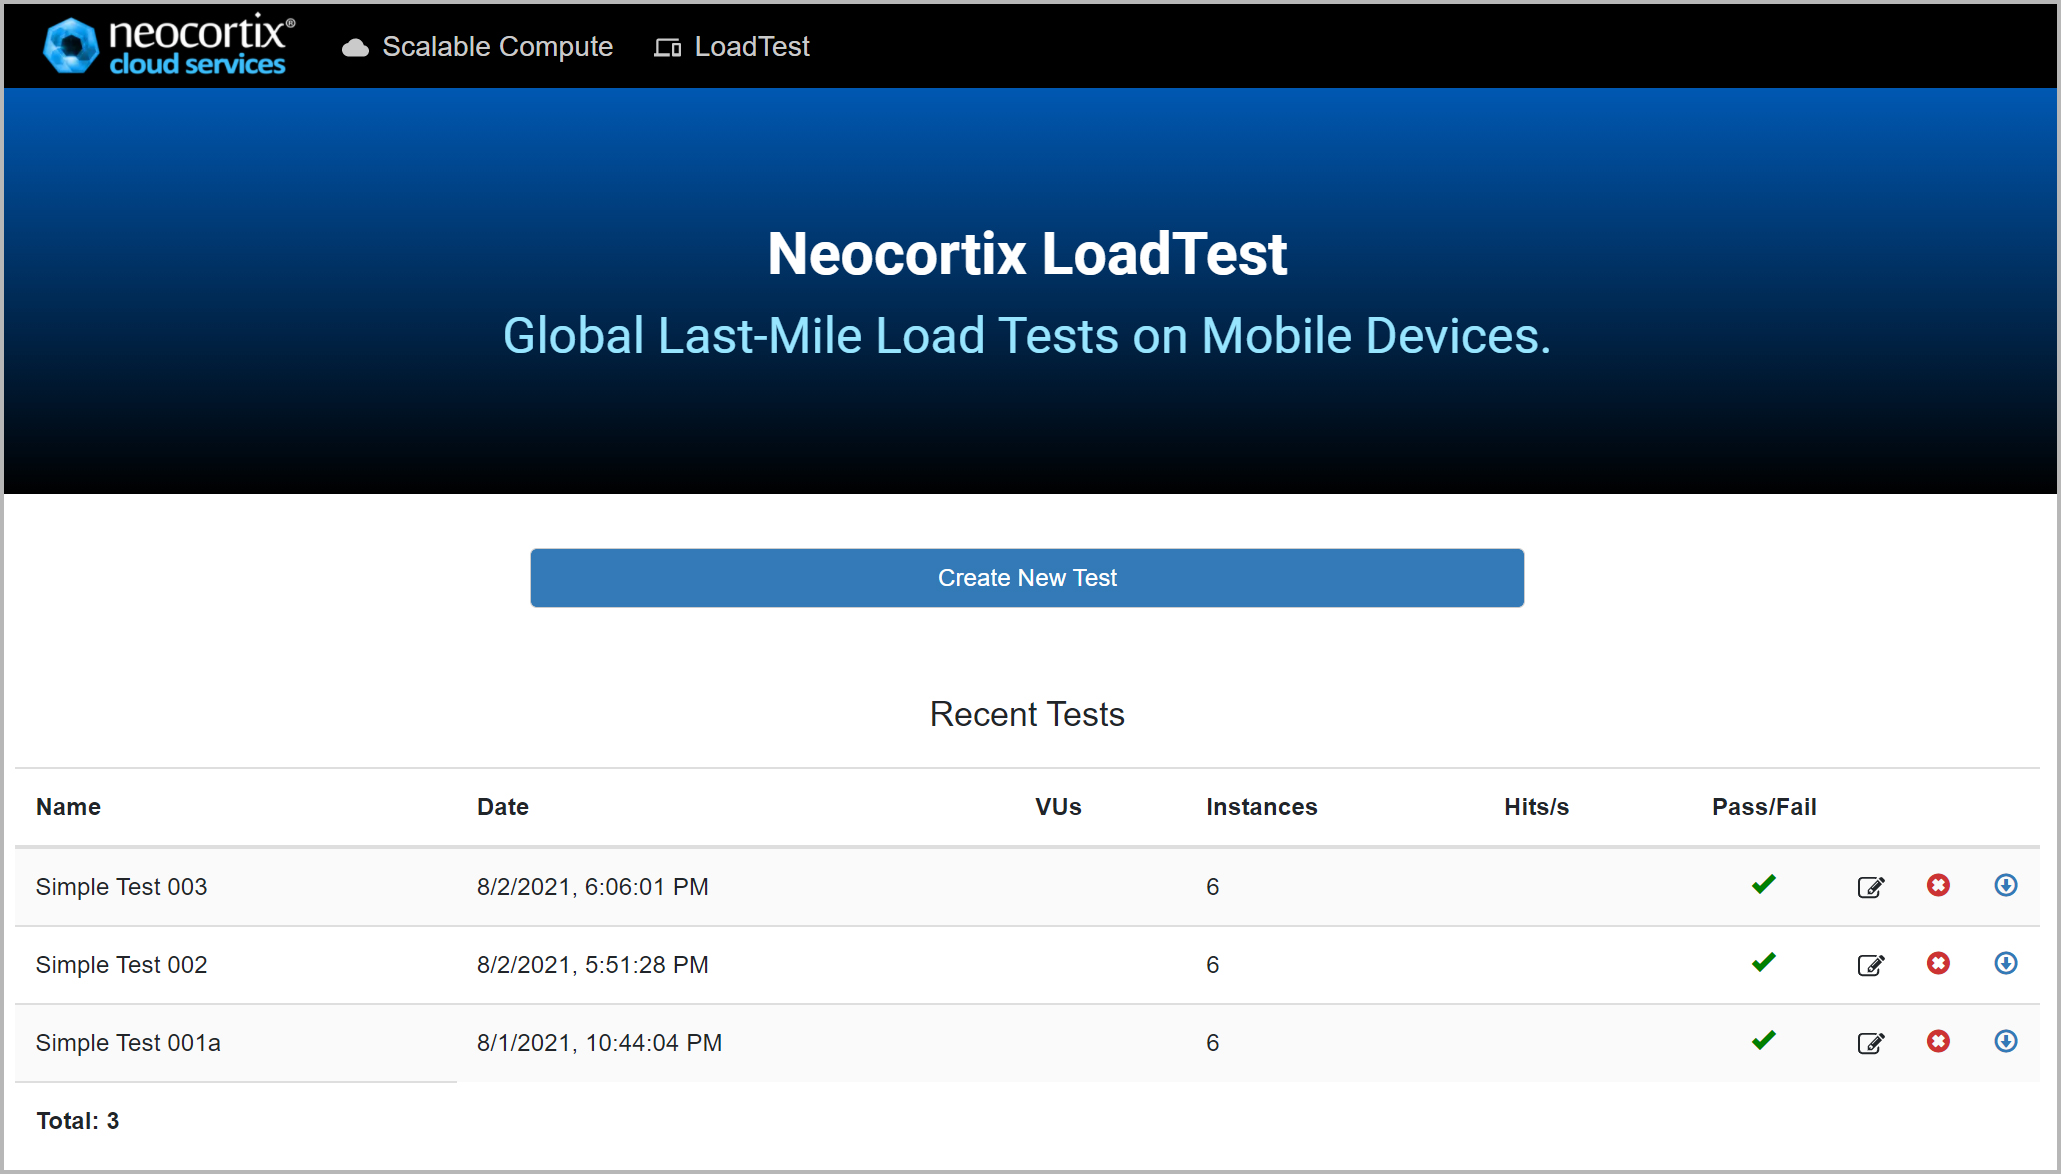
Please click on the button "Create New Test", which will take you to the LoadTest Launch Page:
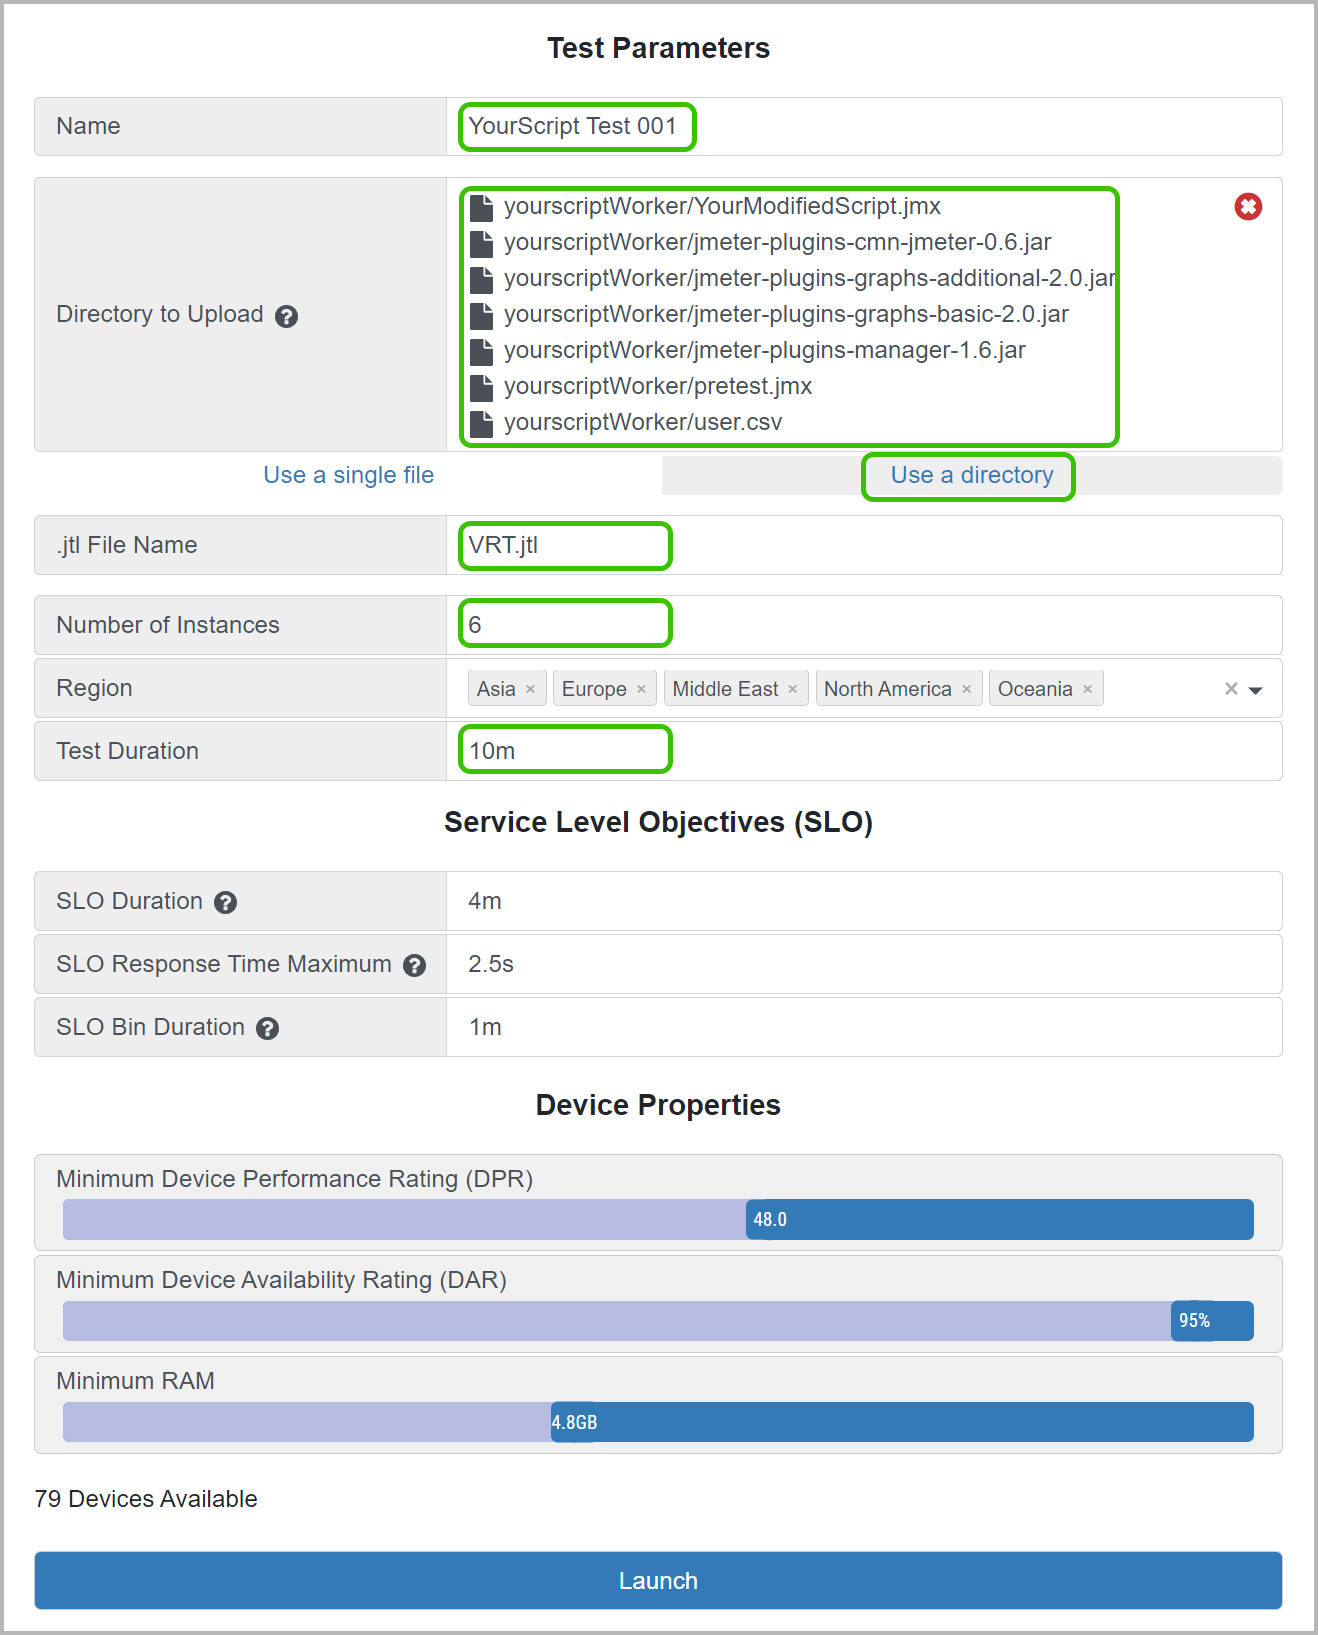
Give your test a Name ("YourScript Test 001"). Select "Use a directory", then click on "Select Directory". Single-click on
Please click on the button "Create New Test", which will take you to the LoadTest Launch Page:
Give your test a Name ("YourScript Test 001"). Select "Use a directory", then click on "Select Directory". Single-click on
yourscriptWorker
directory, and hit "Upload". Confirm the next dialog box by hitting "Upload". (You can see screenshots of this process in the
JMeter Advanced tutorial.)
Fill in the .jtl File Name field with the value
VRT.jtl
, which tells the LoadTest application the .jtl File Name which is used in the .jmx file.
You may also have to modify the
Test Duration
value. By default, it is set to 10m. But you should use the actual value of the duration of your test, as specified in YourModifiedScript.jmx
.
Once you have made those modifications, please click the "Launch" button to run your first test.
Here are example outputs, in

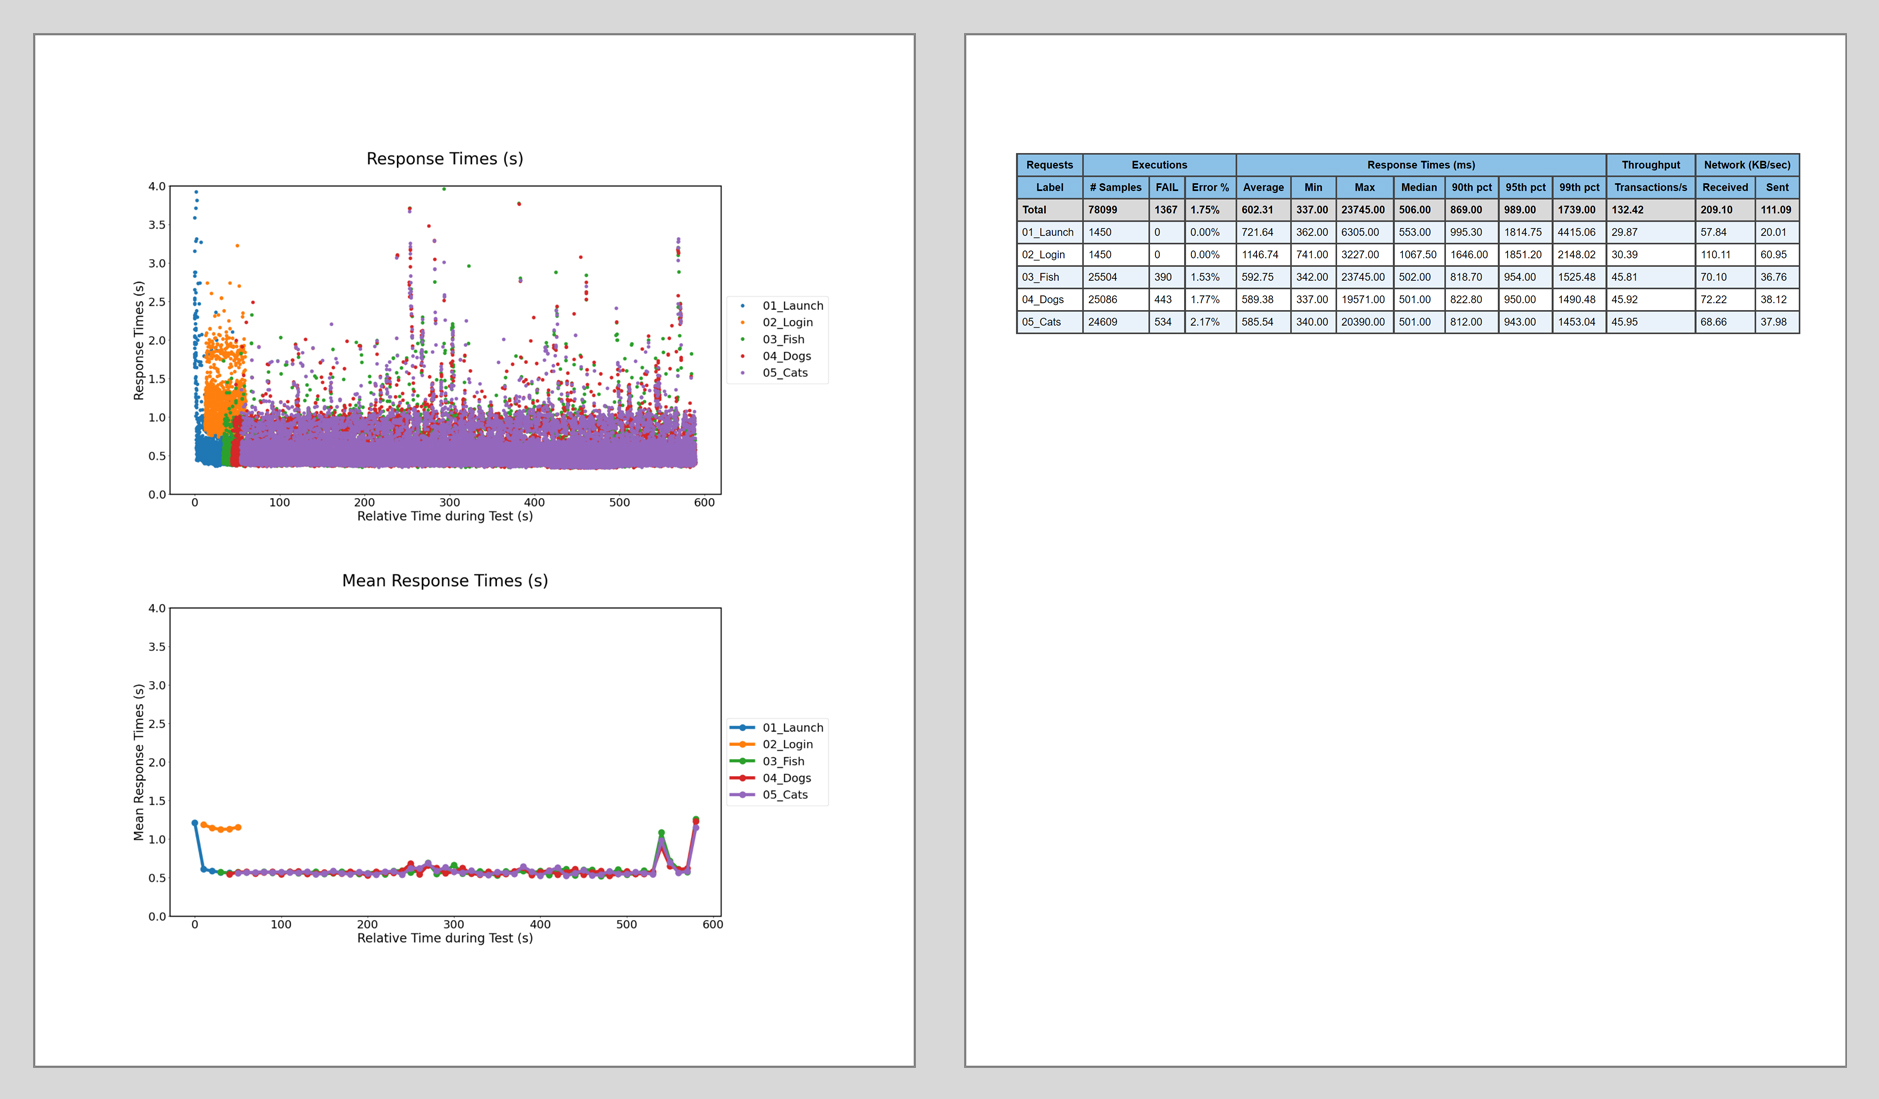
TestResults.html
:
Running a Larger Example of Your Script
Now that you have
YourModifiedScript.jmx
working on a small number of instances, you can run the job again with more instances, by changing the
Number of Instances
value. Try 30, or 50, or more, as long as enough instances are available. And you can experiment with other geographic regions.
When you are ready, hit the "Launch" button to run your larger test.
Congratulations! You have now gotten your own professional Load Testing script running on the Neocortix LoadTest platform. You are ready to begin using it in production at your work!