
In this tutorial, we will show you how run Advanced JMeter scripts with plug-ins, included files, JTL file aggregation, geographic selectivity, and advanced plotting and HTML reporting, using the classic JPetStore example, on the Neocortix LoadTest platform.
This is an advanced tutorial.
We assume you have already signed up for a Neocortix Cloud Services account, and already
downloaded the LoadTest Example Files, which contains a directory
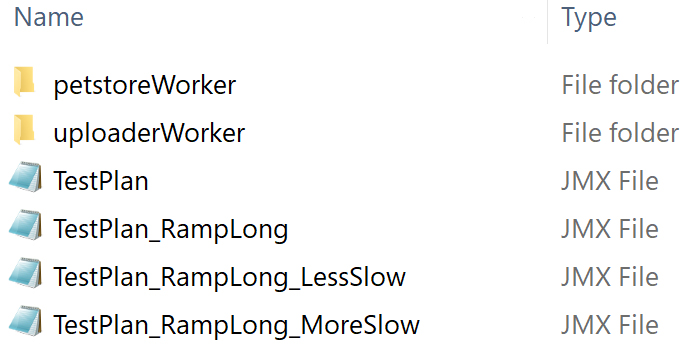
LoadTestFiles
with the following JMeter .jmx files and data directories:
You will use those files to run the various examples below.
And we assume that you have already completed the
Basic JMeter tutorial.
The JPetStore Example
In the files above, you will find the directory
petstoreWorker
, which contains all the files and additional subdirectories that are needed to run the advanced JPetStore example. In particular, it contains the following files:- JPetstore.jmx, the Classic JPetStore load test demo, with various task categories like 01_Launch, 02_Login, 03_Fish, 04_Dogs, 05_Cats, 06_Logout.
- pretest.jmx: A tiny .jmx file used to verify that an instance is capable of running JMeter.
- user.csv: A .csv data file containing user identifiers.
- jmeter-plugins-cmn-jmeter-0.6.jar: Required JMeter plugin file.
- jmeter-plugins-graphs-additional-2.0.jar: Required JMeter plugin file.
- jmeter-plugins-graphs-basic-2.0.jar: Required JMeter plugin file.
- jmeter-plugins-manager-1.6.jar: Required JMeter plugin file.
All of these files in the
petstoreWorker
directory will be sent to each instance.
Running the JPetStore Example
Please go to the LoadTest dashboard at
https://cloud.neocortix.com/load-test:
Please click on the button "Create New Test", which will take you to the LoadTest Launch Page. With only two clicks, you can select the JPetStore Preset Example and Launch it, as shown below:
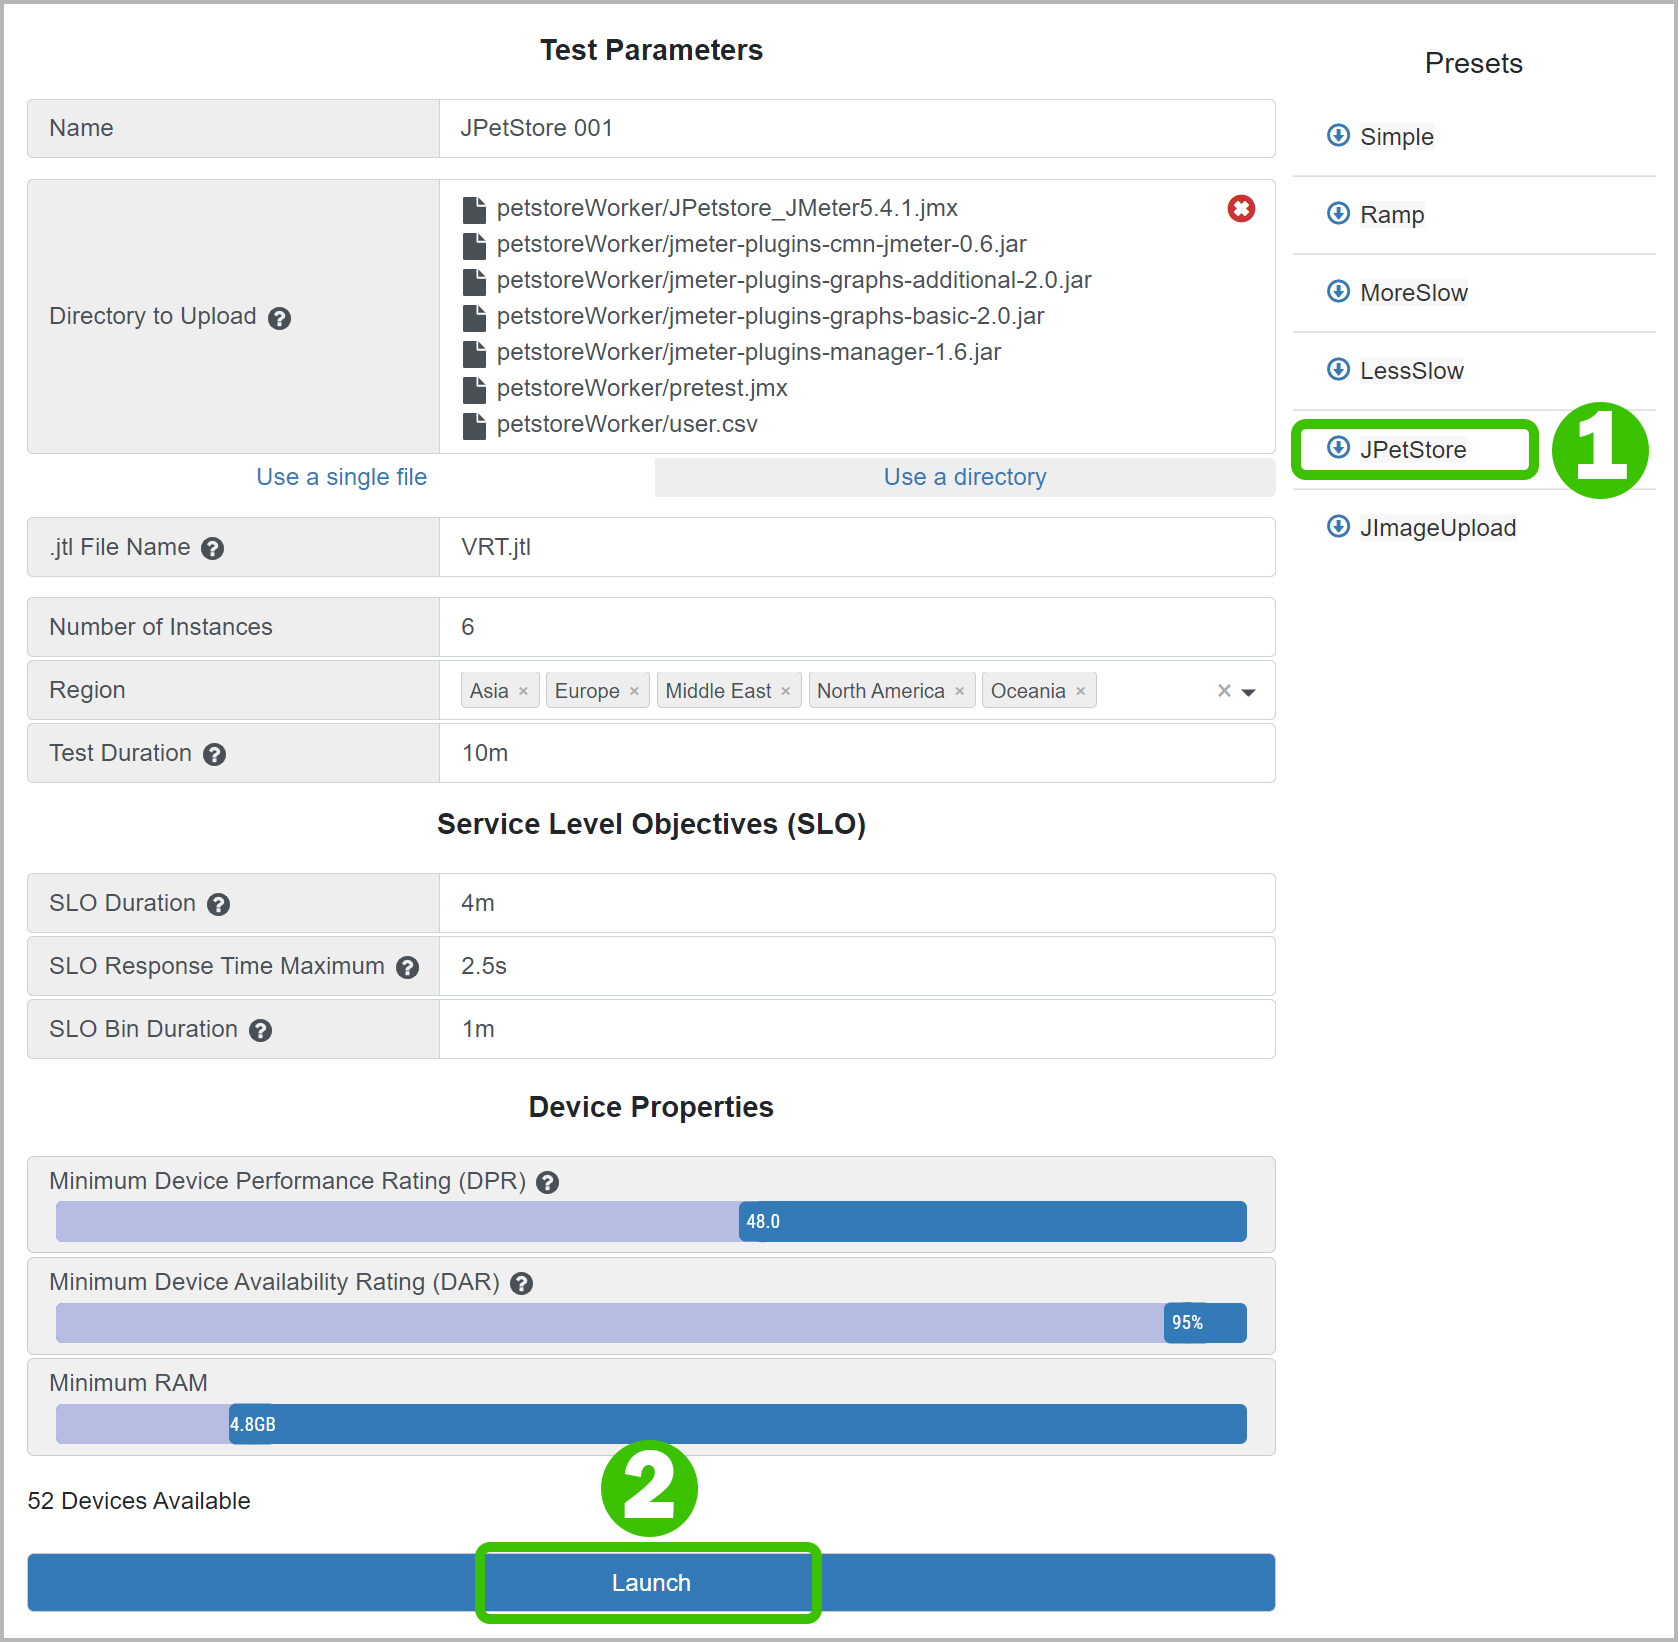
Or you can follow these instructions below to upload files for a test:
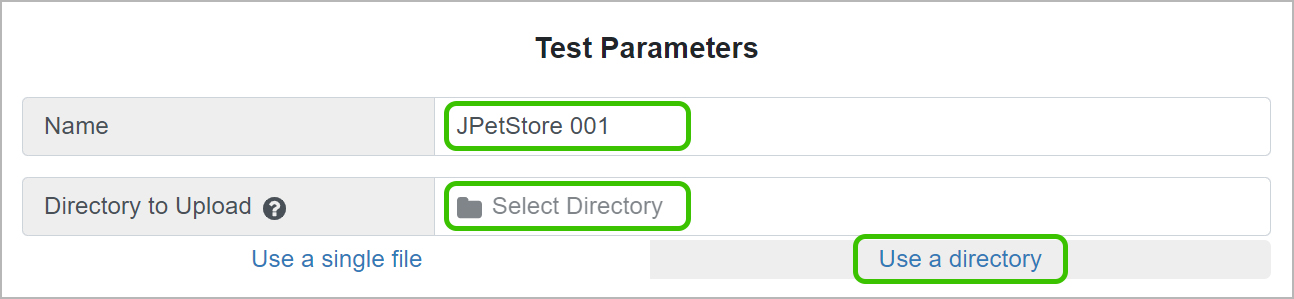
In the example above, we have given our test a Name ("JPetStore 001"). We have selected "Use a directory", as needed for these complex examples. And then we click on "Select Directory", which brings up the dialog box below:
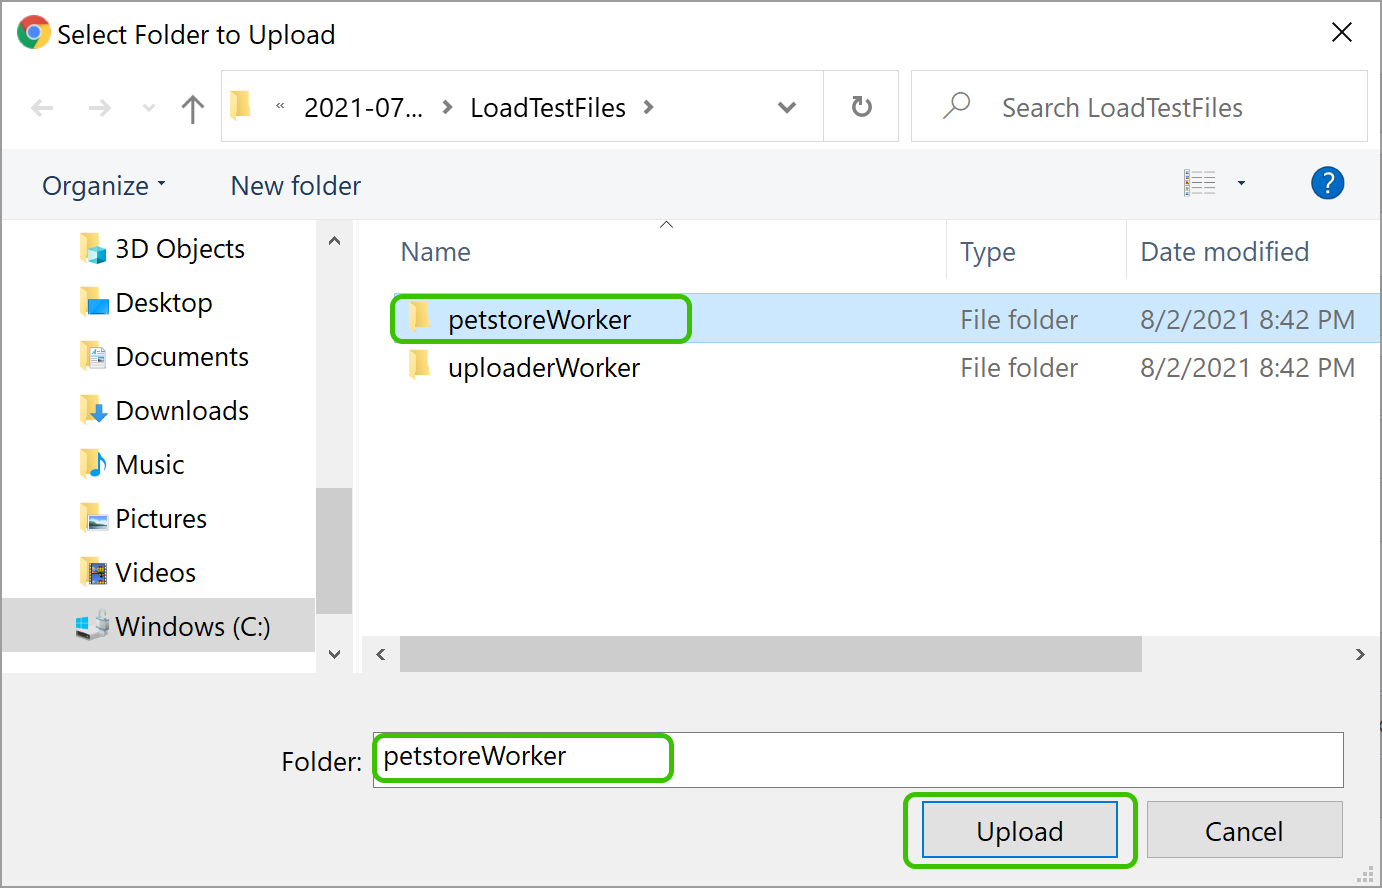
Single-click on the
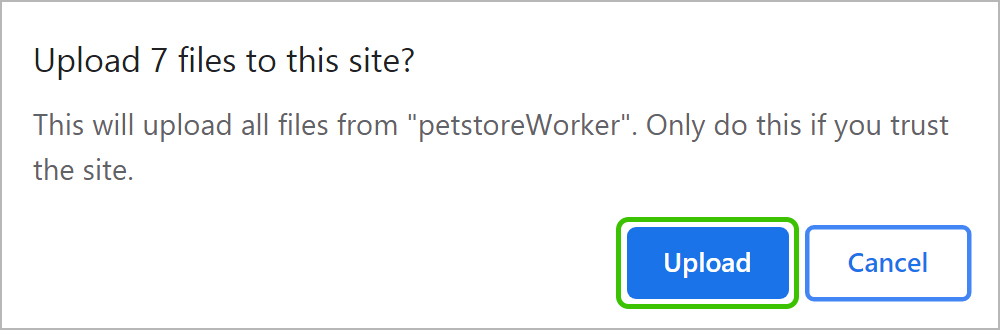
Confirm by clicking "Upload".

We have also filled in the .jtl File Name field with the value
Please click on the button "Create New Test", which will take you to the LoadTest Launch Page. With only two clicks, you can select the JPetStore Preset Example and Launch it, as shown below:
Or you can follow these instructions below to upload files for a test:
In the example above, we have given our test a Name ("JPetStore 001"). We have selected "Use a directory", as needed for these complex examples. And then we click on "Select Directory", which brings up the dialog box below:
Single-click on the
petstoreWorker
directory, and hit "Upload".
Confirm by clicking "Upload".
We have also filled in the .jtl File Name field with the value
VRT.jtl
, which tells the LoadTest application the .jtl File Name which is used in the .jmx file. (You can inspect the
JPetStore.jmx
file and see that
VRT.jtl
appears several times in the View Results Tree section.)
We have left everything else with its default value. Notice that the Number of Instances is left with its default value of 6; in some of the later examples, we suggest that you ask for 30 instances.
Now just click on the "Launch" button, to start your advanced Global Last-Mile Load Test.
It will take about 12 minutes for this Load Test to run. When it is done, the page will look like this:
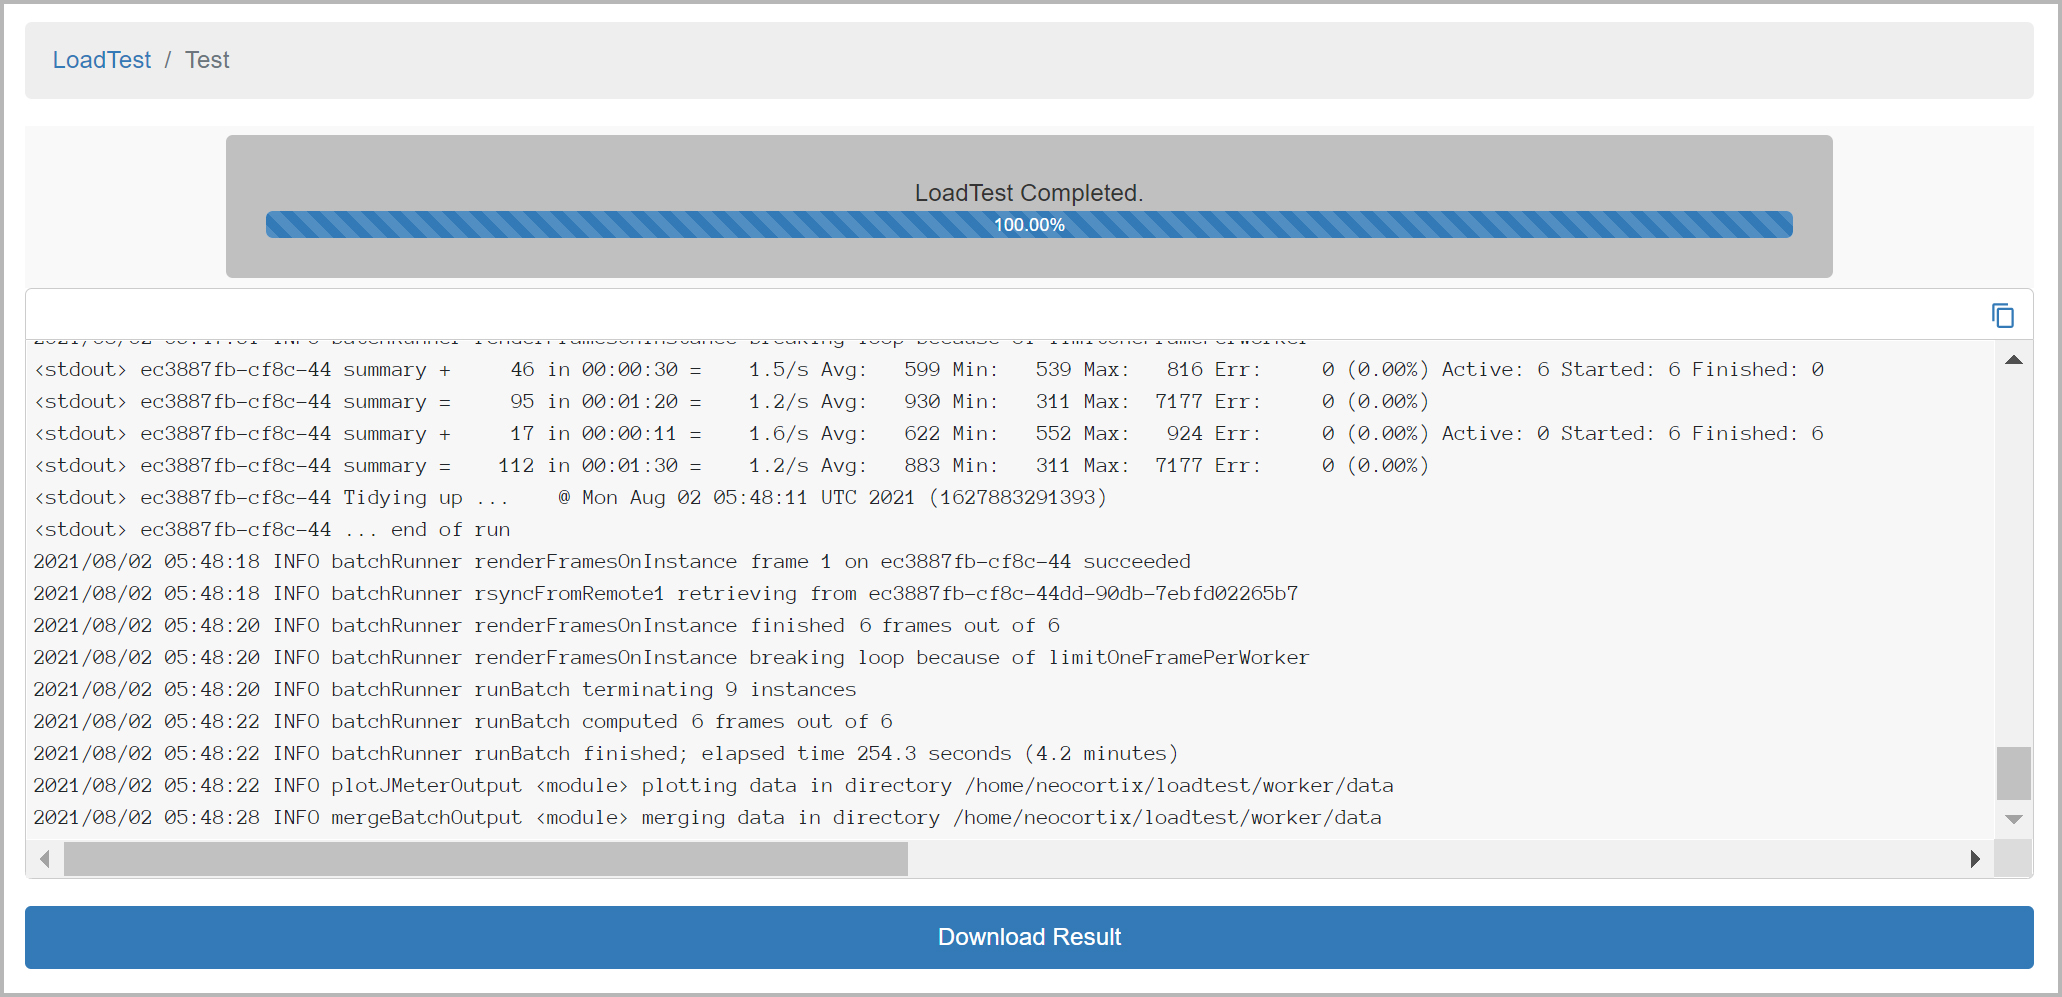
Please click on the "Download Results" button to download a .zip file of your test results. This will include`the output data files from each instance will appear in The generated images will appear in
The report and data files are:
The generated images will appear in
The report and data files are:
Please click on the "Download Results" button to download a .zip file of your test results. This will include`the output data files from each instance will appear in
jmeterOut_<n>/TestPlan_results.csv
jmeterOut_<n>/VRT.jtl
01_WorldMap.png
02_HitsPerSecond.png
03_ResponseTimesByLabel.png
04_ResponseTimesByLabelMean.png
05_ResponseTimesByRegion.png
06_ResponseTimesByRegion2.png
07_ActiveThreads.png
08_Graphs2.png
09_Graphs3.png
10_Histogram2.png
11_SLOcomparison.png
TestResults.html (Neocortix HTMl report)
htmlReport (JMeter HTML report directory)
trackedStderr.log (log file from the run)
VRT_<datestamp>.jtl (merged data file .jtl)
Here are example outputs, in

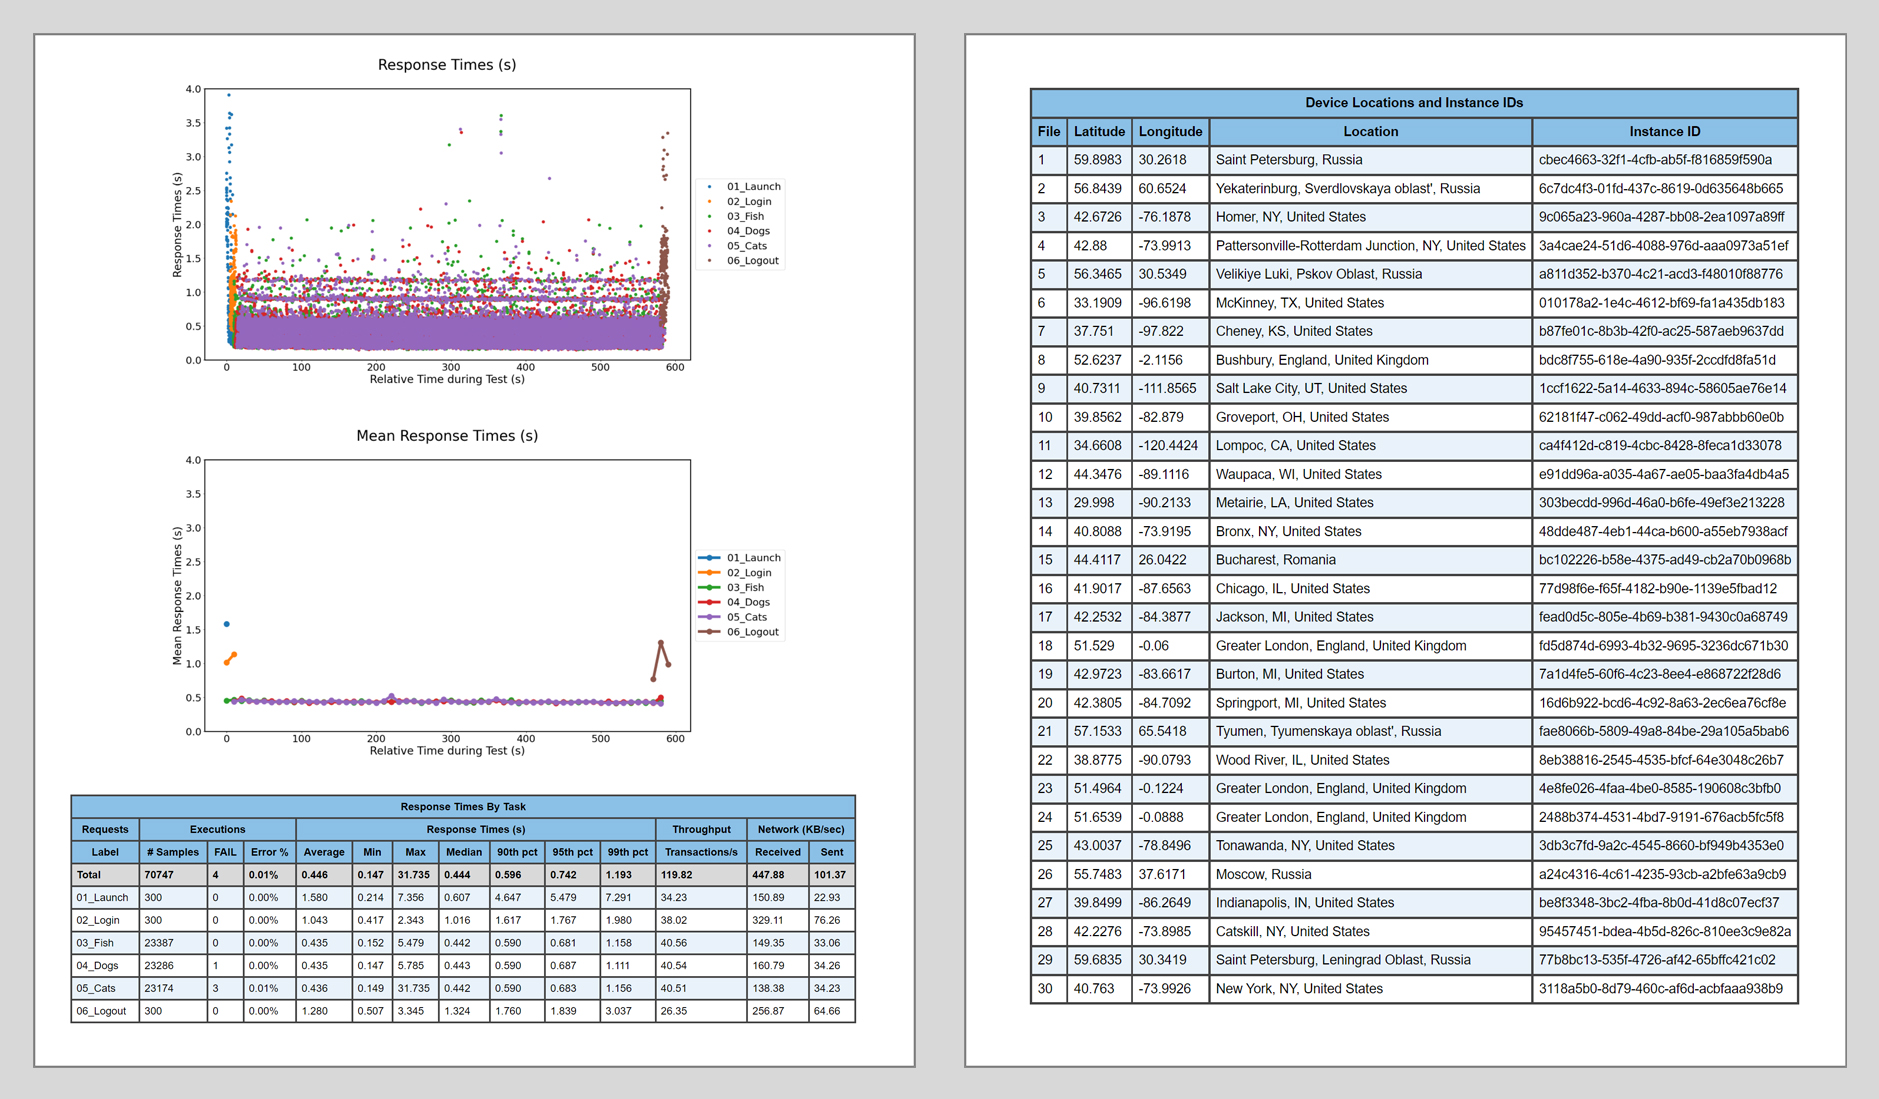
TestResults.html
:
Running a Larger Example
Now that you have the JPetStore example working on a small number of instances, you can try running it on a larger number of instances, say 30. Just create a new test with the same parameters as above, except set Number of Instances to 30, and hit the Launch button, and you should get results similar to the above.
The JImageUpload Example
In the files above, you will find the directory
uploaderWorker
, which contains all the files and additional subdirectories that are needed to run the advanced JImageUploader example. In particular, it contains the following files:- JImageUpload.jmx, based on the JPetStore load test demo, with various task categories like 01_Launch, 02_Login, 03_Fish, 04_Dogs, 05_Cats, the additional 06_ImageUpload task, and 07_Logout.
- pretest.jmx: A tiny .jmx file used to verify that an instance is capable of running JMeter.
- user.csv: A .csv data file containing user identifiers.
- jmeter-plugins-cmn-jmeter-0.6.jar: Required JMeter plugin file.
- jmeter-plugins-graphs-additional-2.0.jar: Required JMeter plugin file.
- jmeter-plugins-graphs-basic-2.0.jar: Required JMeter plugin file.
- jmeter-plugins-manager-1.6.jar: Required JMeter plugin file.
- TestData/TestData/imageDetails.csv: .csv file describing the image files to be uploaded, and giving their paths in the correct format.
- TestData/TestData/image1.png: Image file.
- TestData/TestData/image2.png: Image file.
- TestData/TestData/image3.png: Image file.
All of these files in the
uploaderWorker
directory will be sent to each instance.
Running the JImageUpload Example
Just follow the instructions above to Create New Test, except
give your test a new name ("JImageUpload 001"). You can simply choose the JImageUpload Preset Example and Launch it, or you can follow the instructions below to upload the example files.
For the data directory, select the
For the data directory, select the
uploaderWorker
directory from the LoadTestFiles .zip file we downloaded earlier.
As before, fill in the .jtl File Name field with the value
VRT.jtl
, which tells the LoadTest application the .jtl File Name which is used in the .jmx file.
Here are example outputs, in
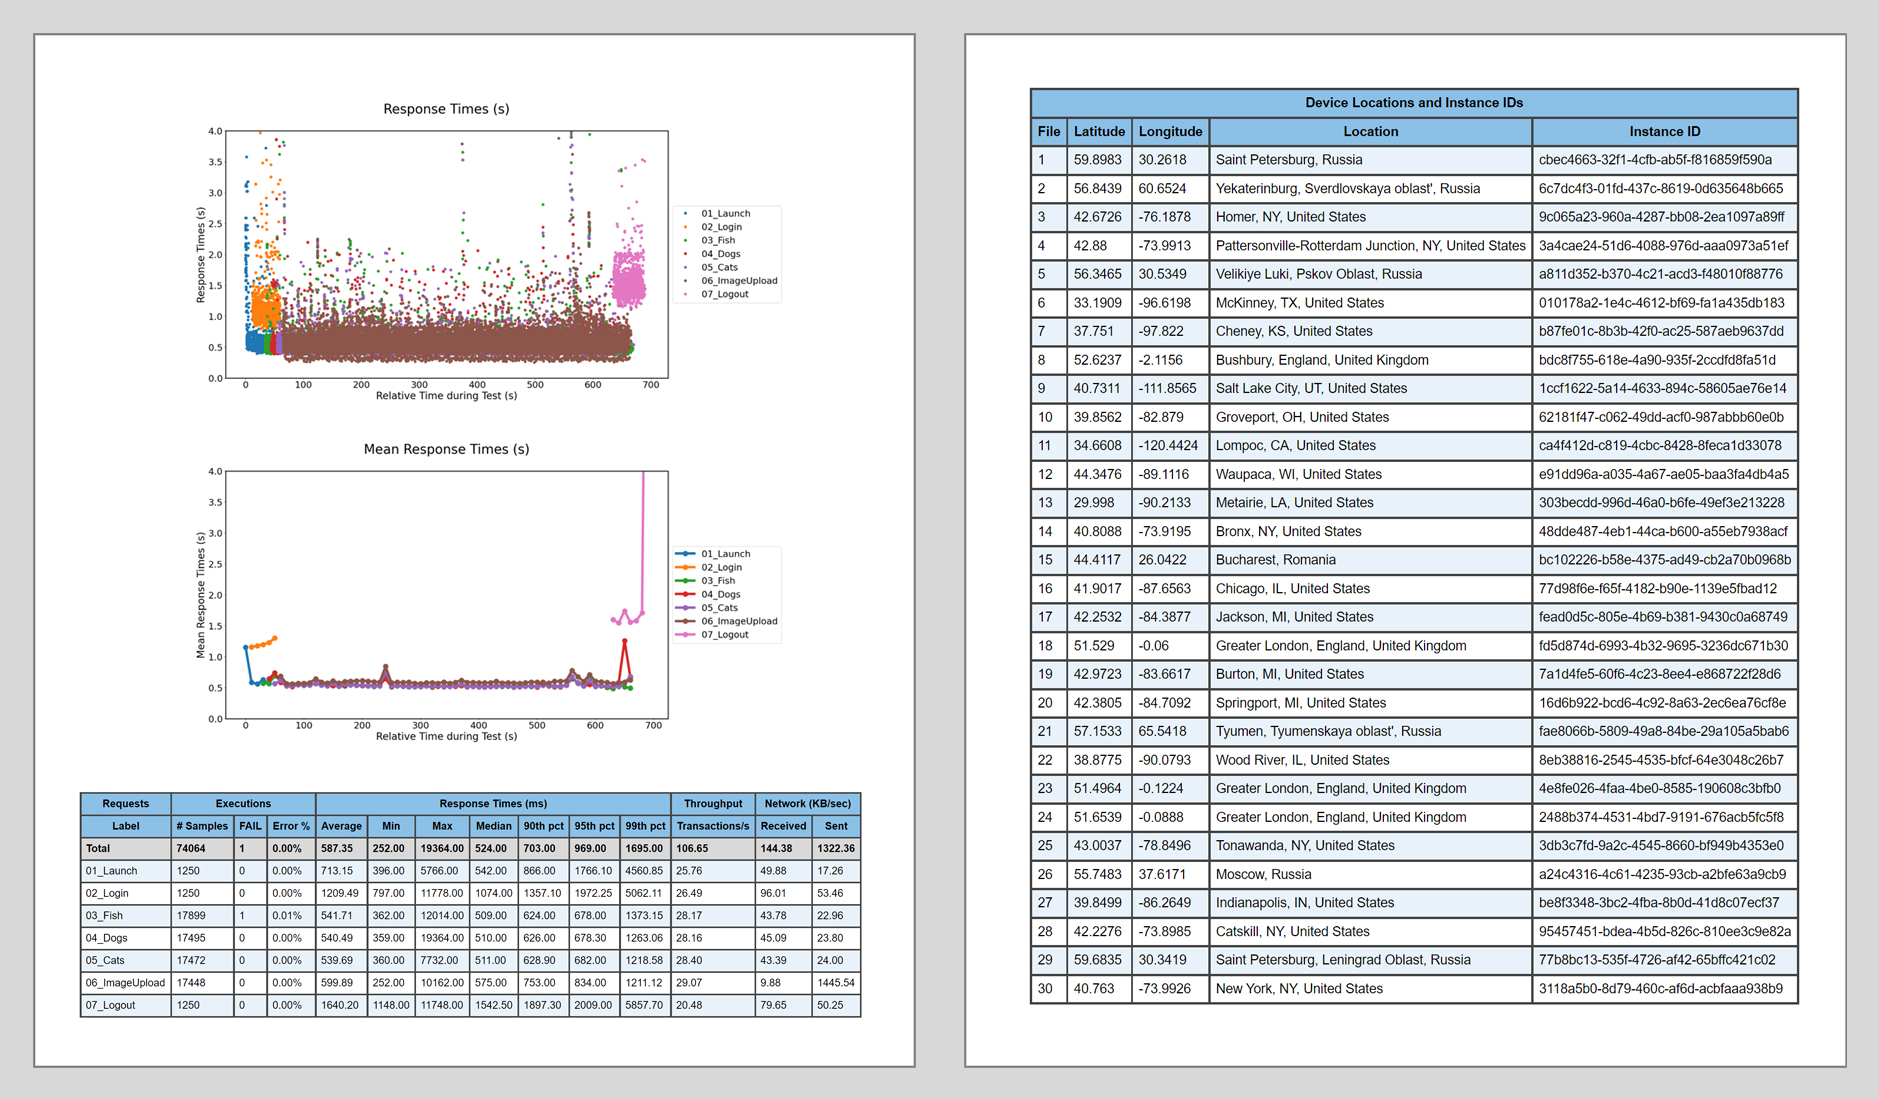
TestResults.html
, showing the results for the new
06_ImageUpload
task: