In this tutorial, we will show you how to use Neocortix Cloud Services Scalable Compute to run a distributed LoadTest interactive job using NeoLoad 7.11, 7.10.1, 7.10, 7.7 or 7.6, GUI, Web On-Prem or Web SaaS, using devices from the Neocortix LoadTest platform.
Launching The Instances
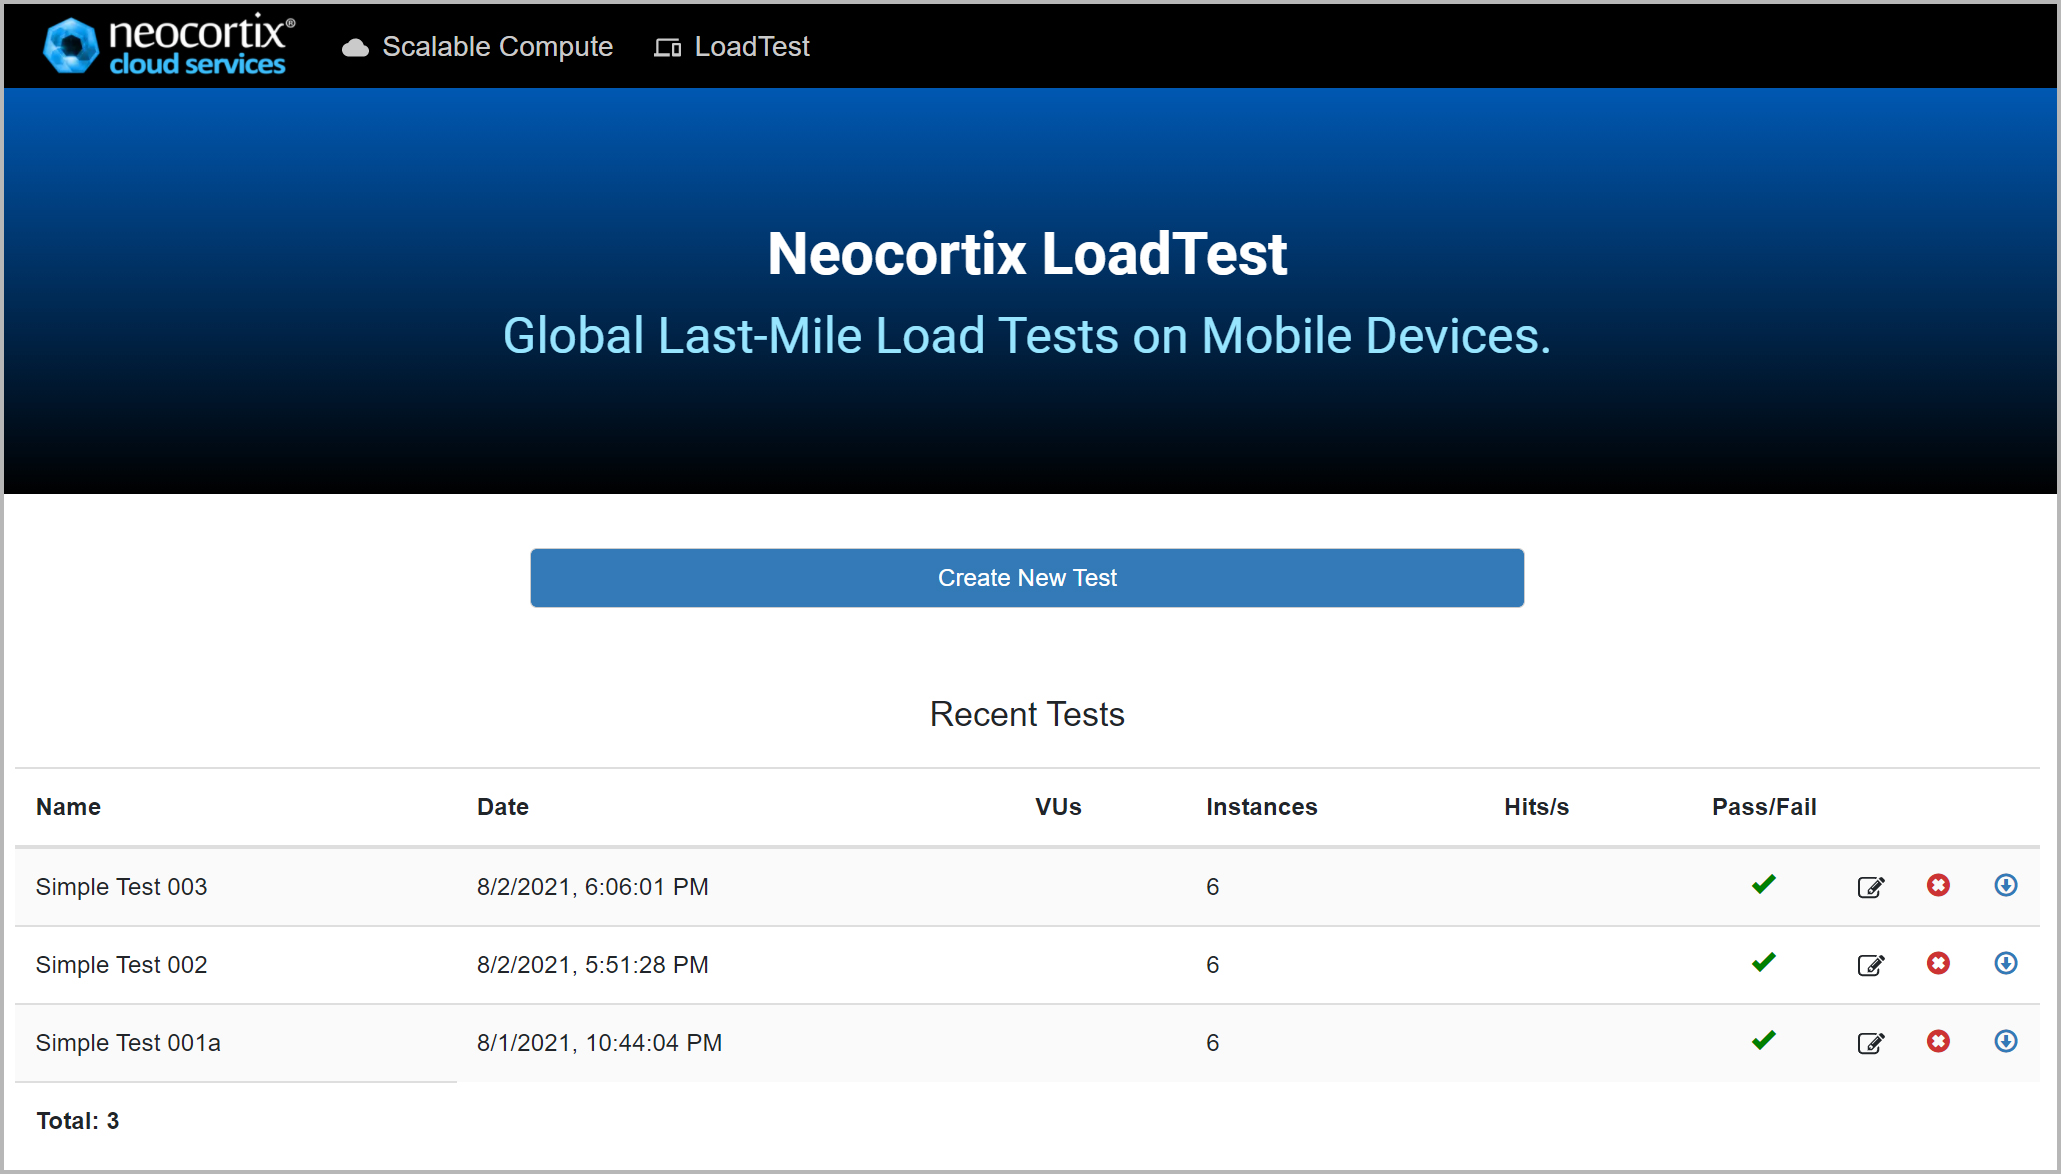
Please go to the LoadTest dashboard at
https://cloud.neocortix.com/load-test:
Please click on the button "Create New Test", which will take you to the LoadTest Launch Page. Select the NeoLoad option in the chooser at the top of the page. You can enter a name for your test; in our example, we have named it "NeoLoad Test 001". You can take the default parameters of 6 instances, and any geographic region, and then hit the Launch button to Launch your instances, as shown below:
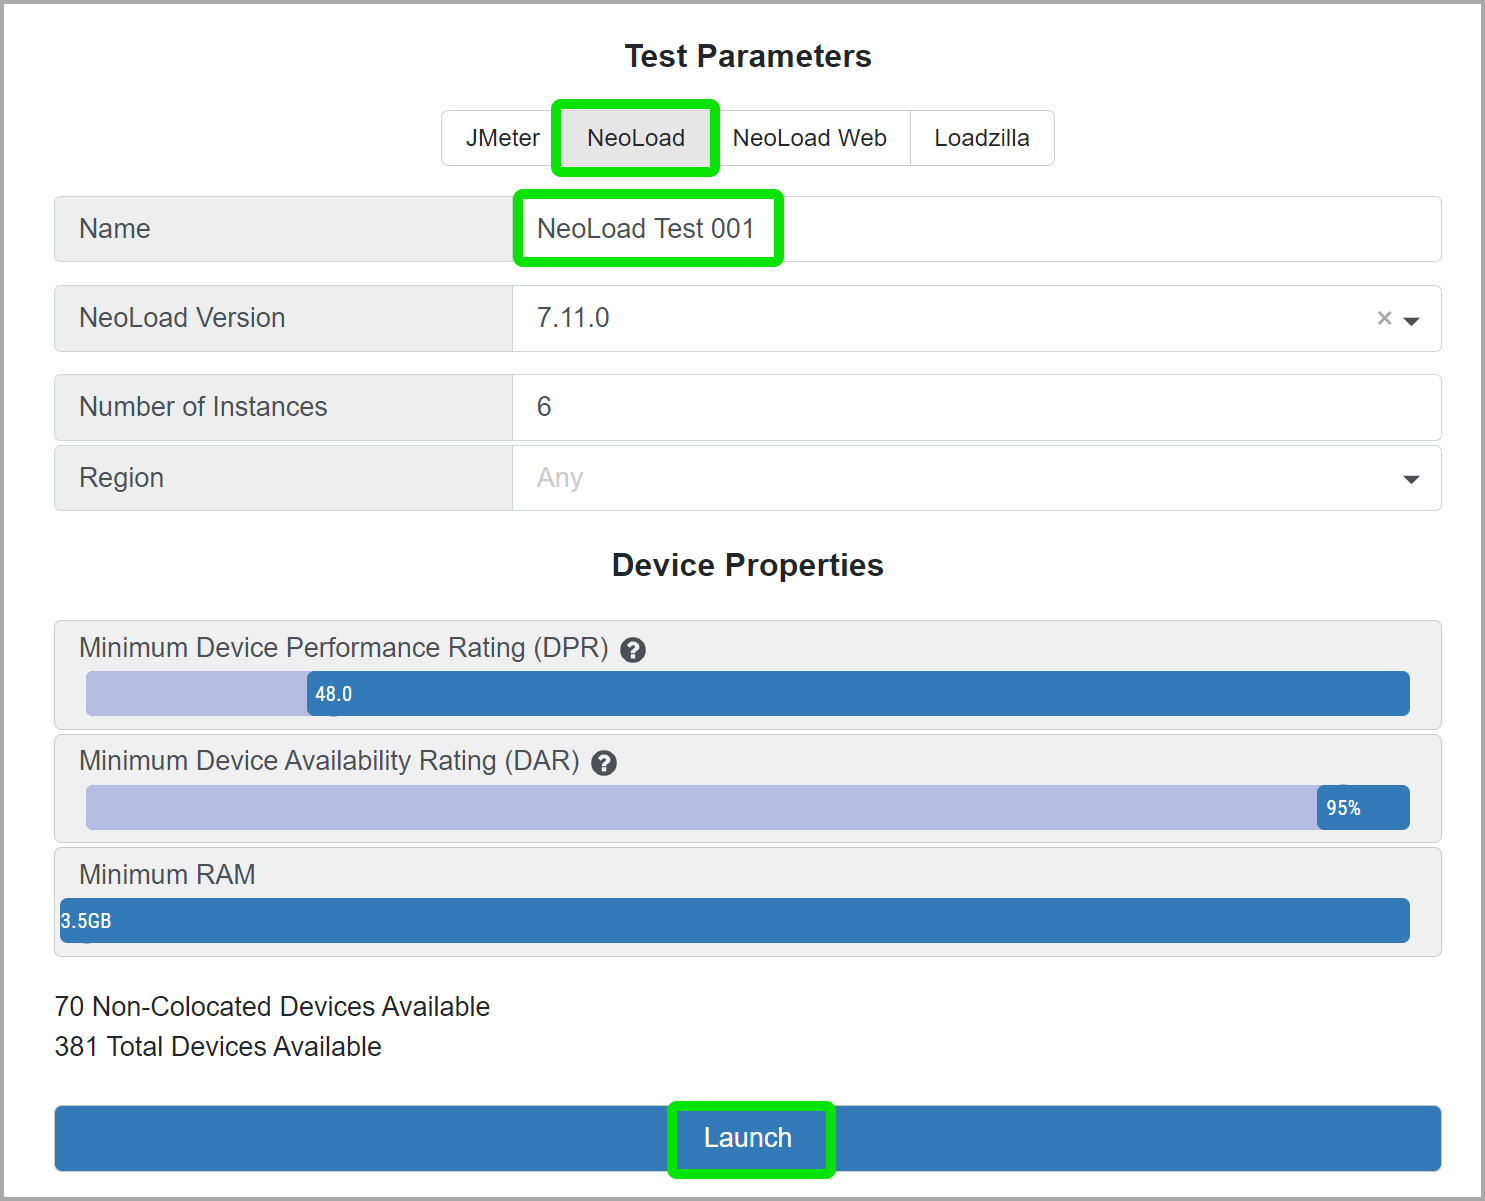
Please click on the button "Create New Test", which will take you to the LoadTest Launch Page. Select the NeoLoad option in the chooser at the top of the page. You can enter a name for your test; in our example, we have named it "NeoLoad Test 001". You can take the default parameters of 6 instances, and any geographic region, and then hit the Launch button to Launch your instances, as shown below:
It may take about 5 minutes to launch the instances and install the NeoLoad load agents onto them. When the instances are available, the page will look like this:
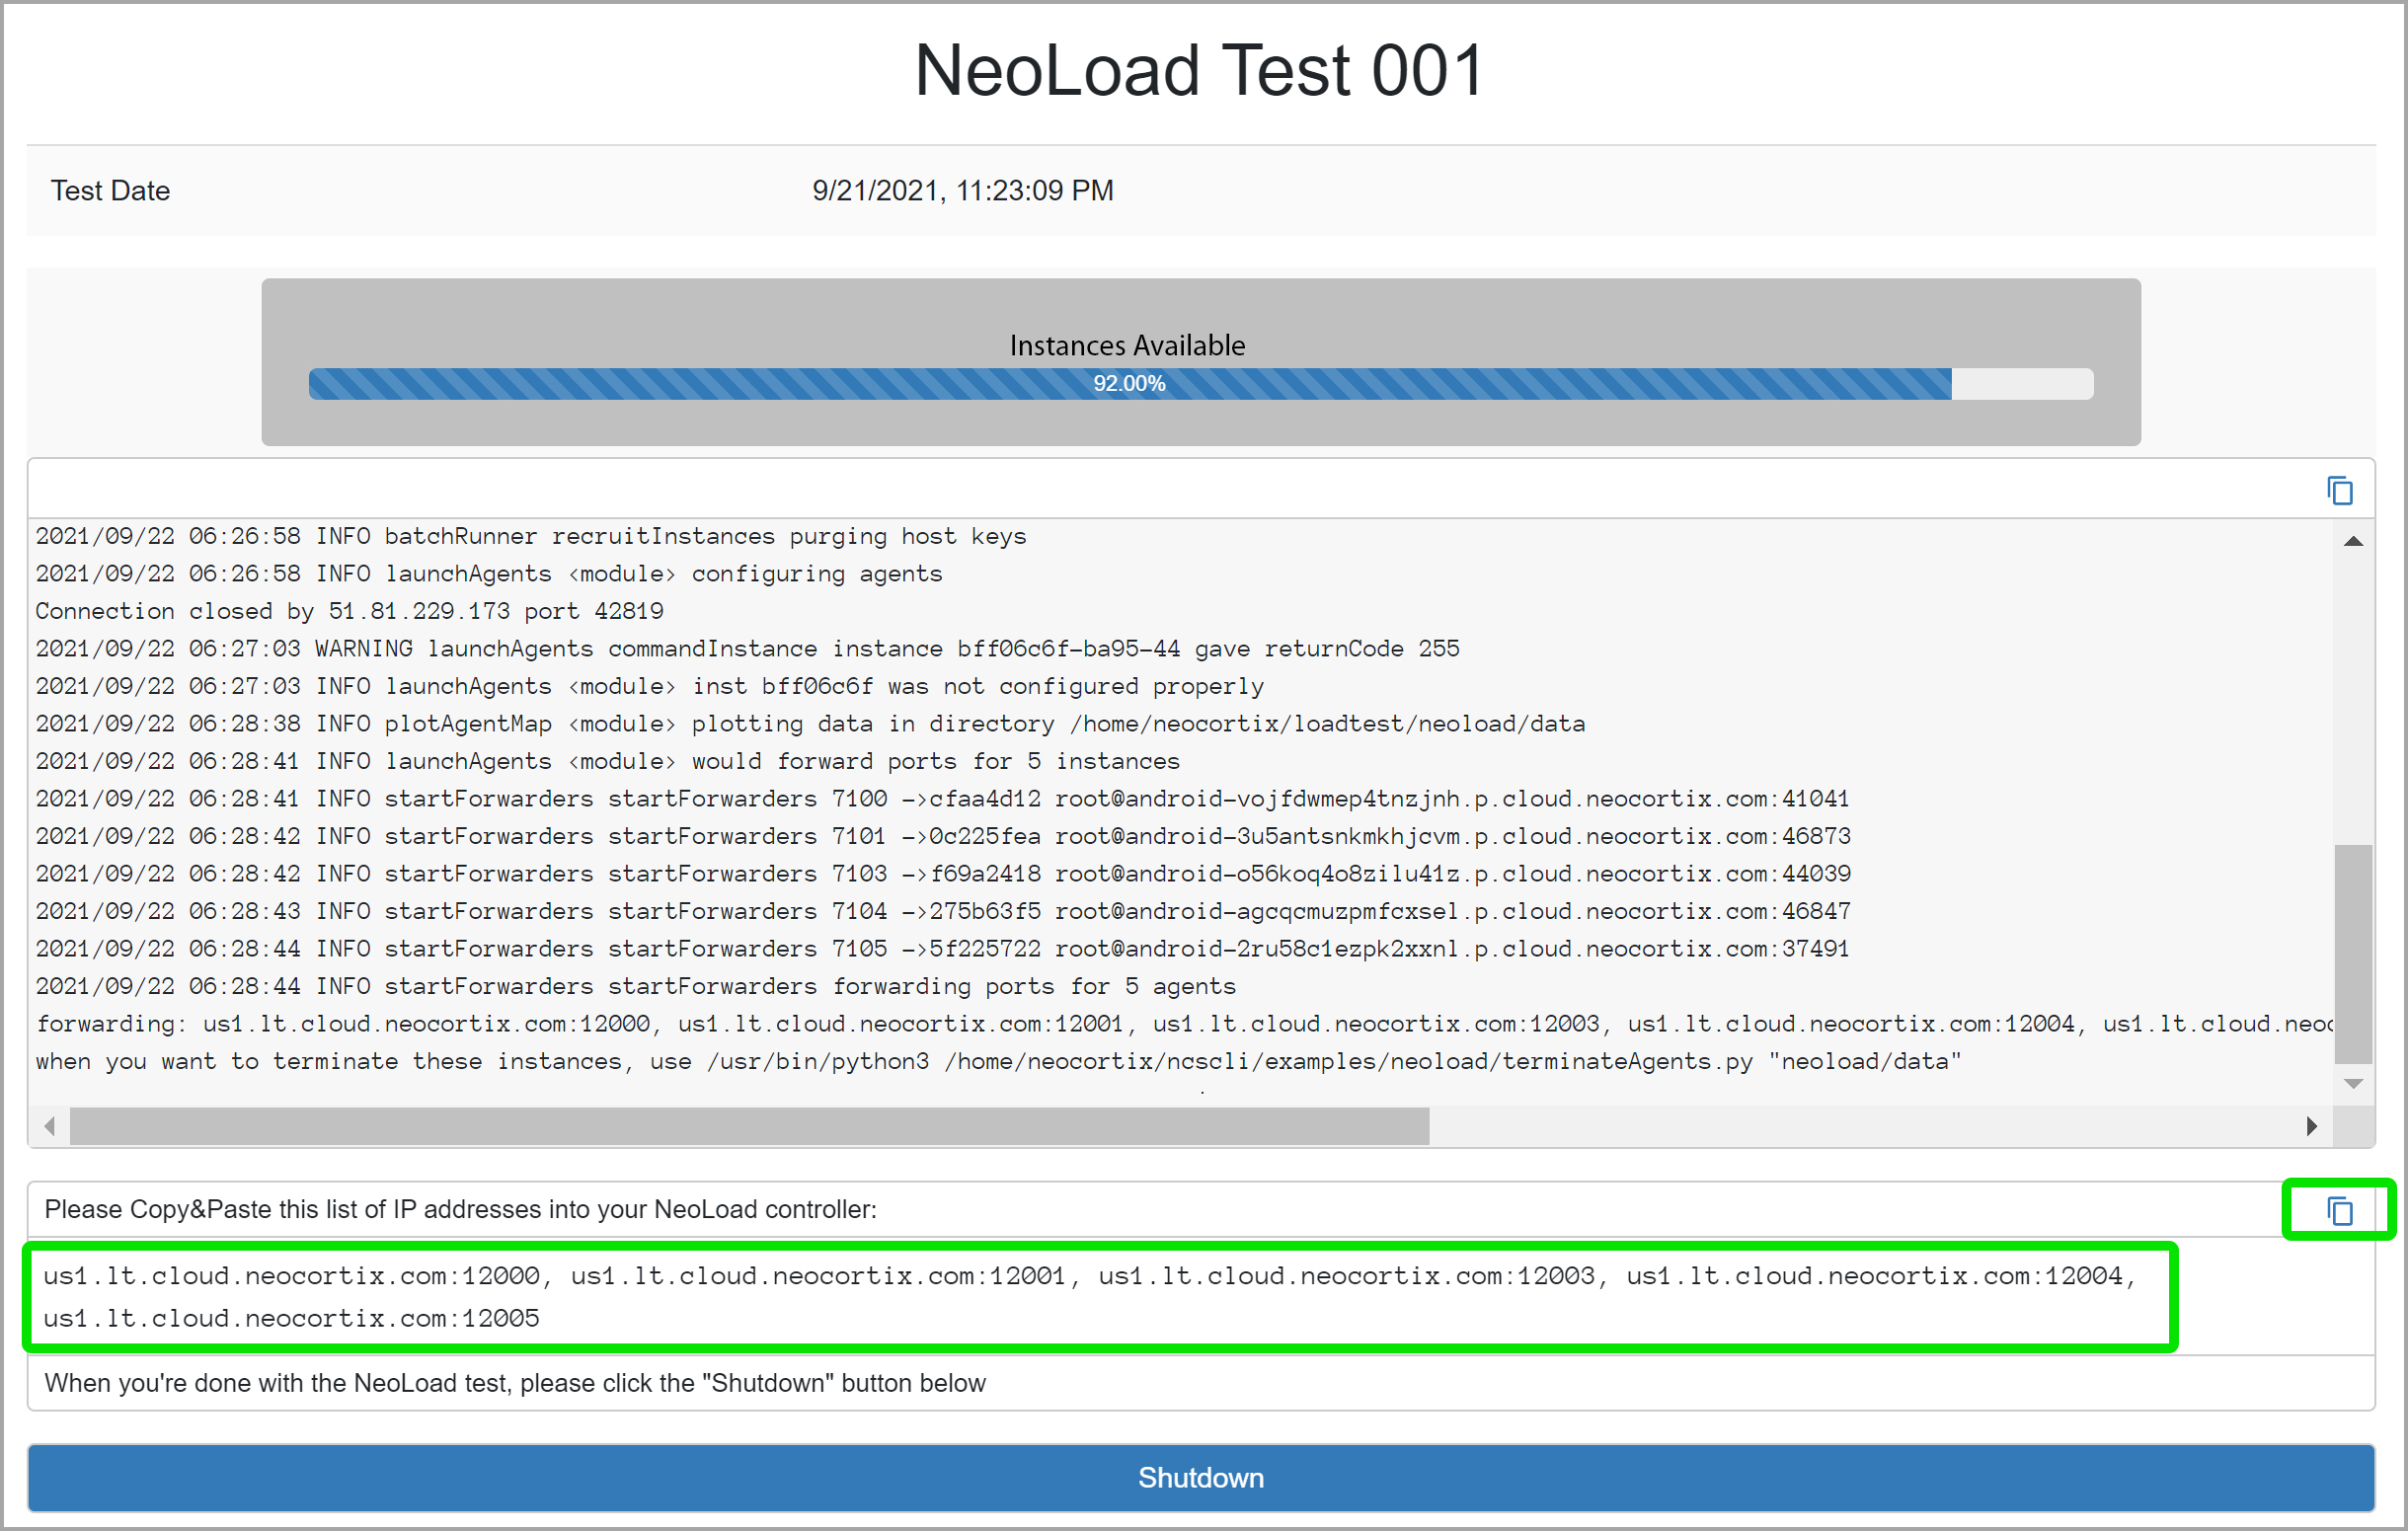
At this point, the Load Generator Agents are waiting for the NeoLoad Controller to contact them and tell them to start working. You will be copying the list of IP addresses from this step and pasting them into the NeoLoad controller in the next step.
Now run the NeoLoad controller application. In the Runtime Scenarios tab, there is a "Load Generators" list with a Plus Sign for adding generators.
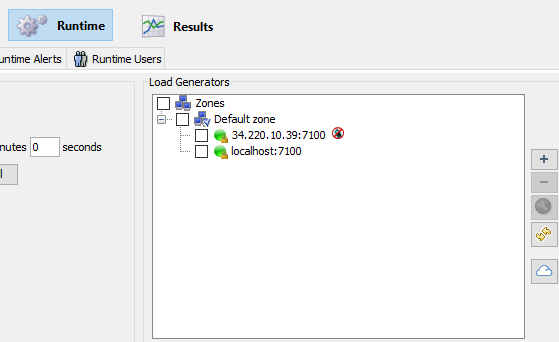
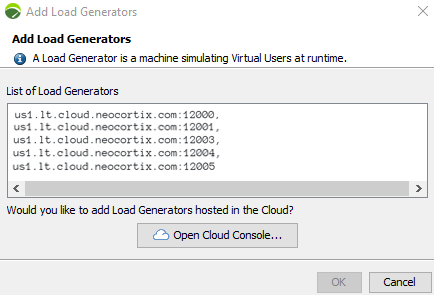
Click the Plus Sign. Then copy the list of host:port pairs from the "forwarding" line of the launchAgents output, and paste it into the "Add Load Generators" edit box.
When you click OK, you should see your load generator addresses in the list, with little green dots next to them. Now click the checkbox next to each one, to enable it. If any of little dots are red, don't enable those. (If ALL of them are RED, it probably means there is a problem with the IP address of the launchAgents machine, or possibly that the firewall has not been configured properly.)
Make whatever other NeoLoad settings you like. We have found that it's good to allocate several simulated users for each load generator you have launched.
Click the "play" button to start a test. It may take up to 5 minutes for the test to initialize and get going. Occasionally, you may find that one or two of the agents does not work. This can happen due to real-world network circumstances.
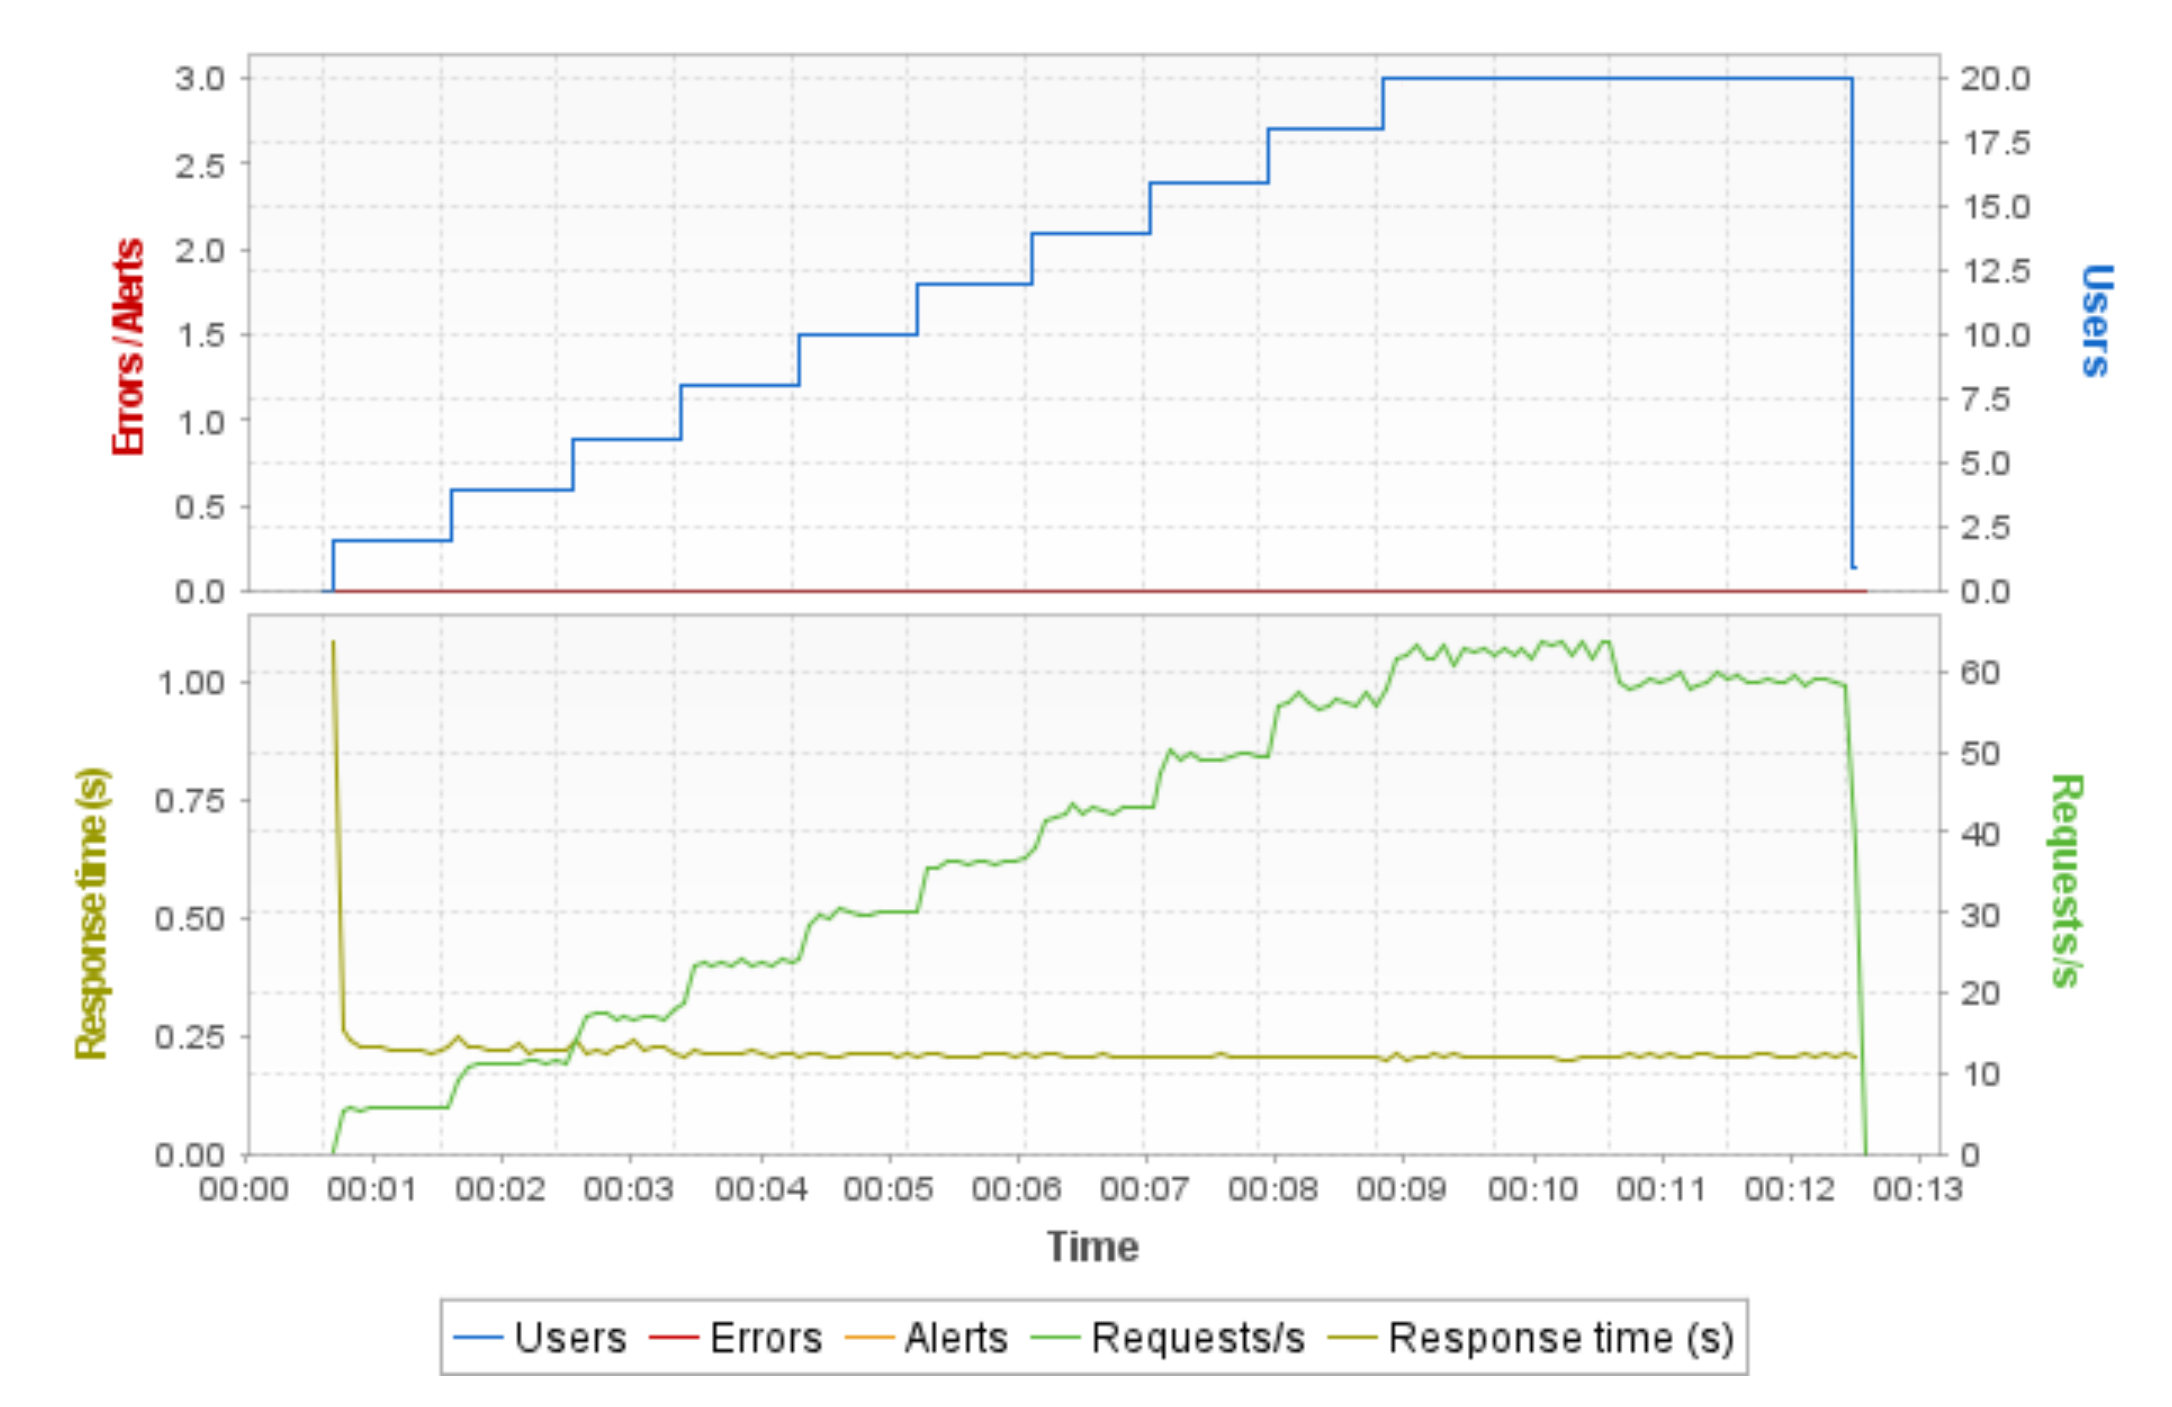
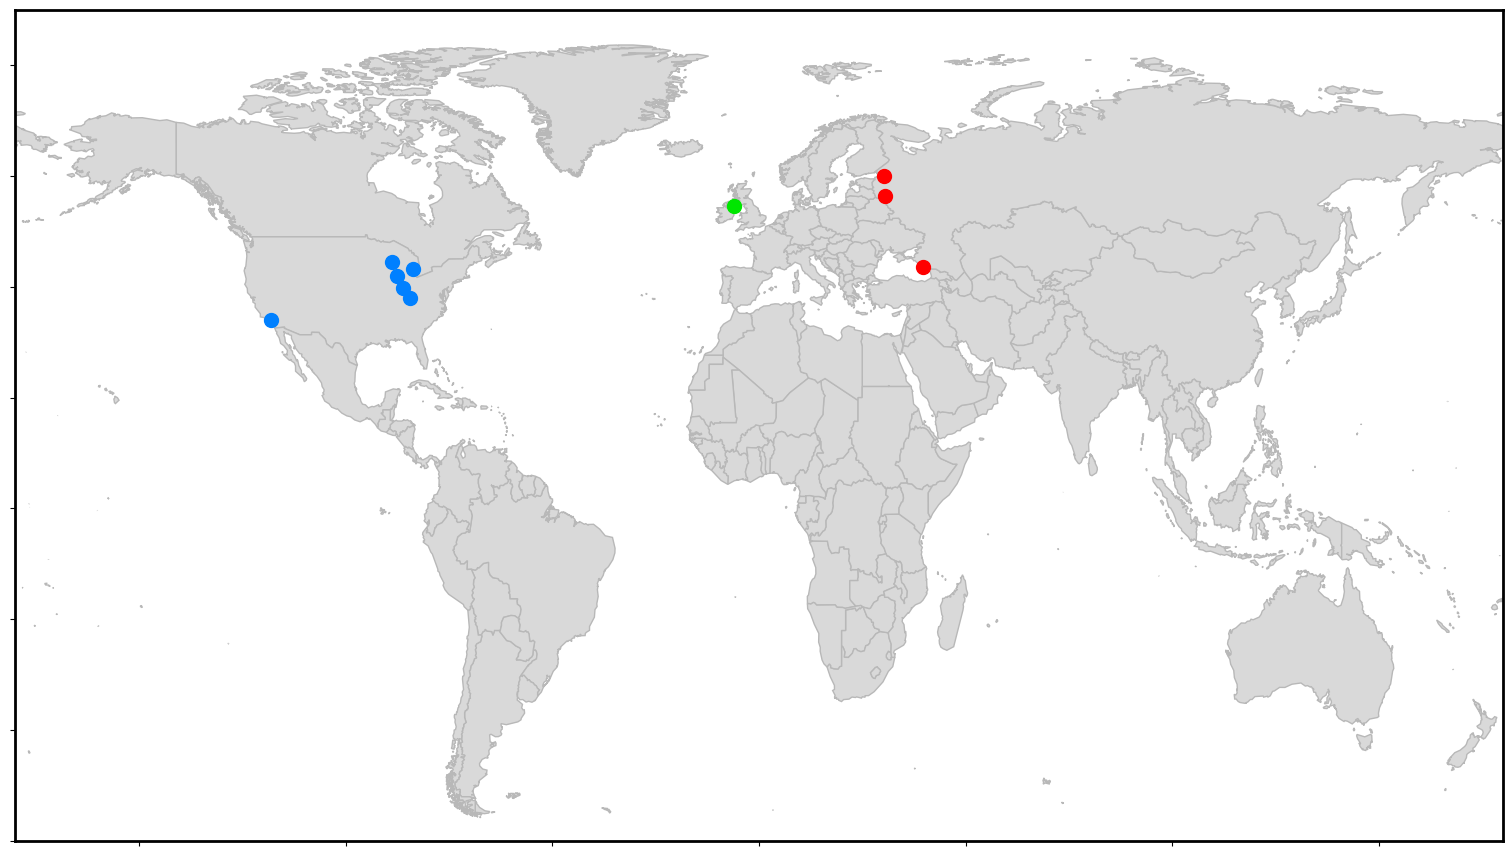
Here is an output graph and World Map for a 12-minute test (with 10 1-minute ramp steps) on 10 load generators.
When you are done testing, you may terminate the instances by hitting the Shutdown button on the LoadTest launch page.
NeoLoad Web Example
NeoLoad Web has a more powerful interface which makes it much easier to tell the NeoLoad Controller where to find the Load Generators. To use Neocortix LoadTest instances with NeoLoad Web,
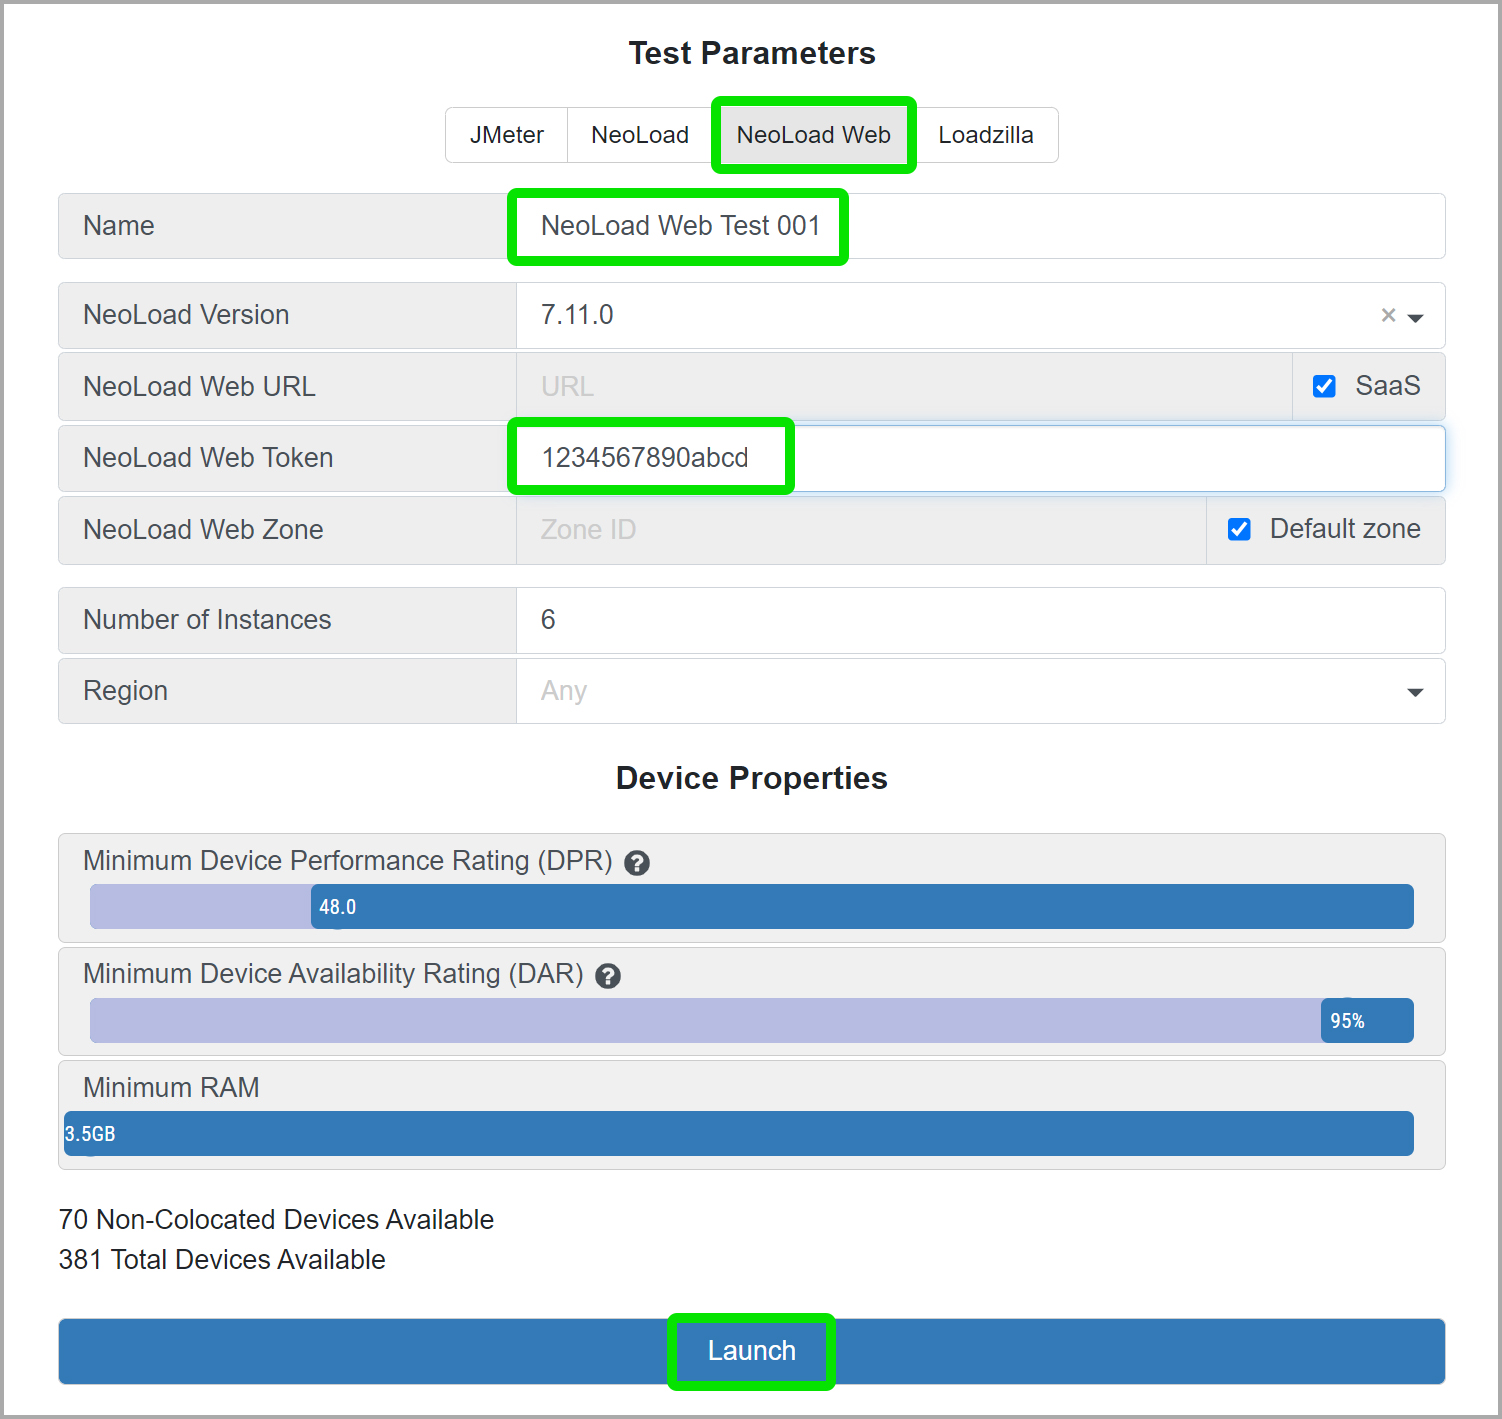
Select the NeoLoad Web option in the chooser at the top of the page.
You can enter a name for your test; in our example, we have named it "NeoLoad Web Test 001". You will have to enter a NeoLoad Web Token, as we have shown. You will get that from the NeoLoad Web interface.
Note that the "Saas" box is checked; we are demonstrating the use of NeoLoad Web SaaS. If you want to use NeoLoad Web On-Prem, please uncheck the "Saas" box, and provide the URL for your NeoLoad Web On-Prem server.
You can take the default parameters of 6 instances, and any geographic region, and then hit the Launch button to Launch your instances, as shown below:
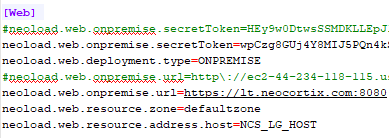
Instead of copy/pasting a list of IP addresses into the Controller, our instances are given an nlweb.properties properties file, with settings like these:
Note that the "Saas" box is checked; we are demonstrating the use of NeoLoad Web SaaS. If you want to use NeoLoad Web On-Prem, please uncheck the "Saas" box, and provide the URL for your NeoLoad Web On-Prem server.
You can take the default parameters of 6 instances, and any geographic region, and then hit the Launch button to Launch your instances, as shown below:
Instead of copy/pasting a list of IP addresses into the Controller, our instances are given an nlweb.properties properties file, with settings like these:
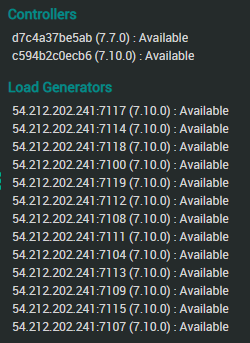
That makes them connect to the NeoLoad Web server and make themselves available for tests. The NeoLoad Web server shows them in its “resources” display, like this:
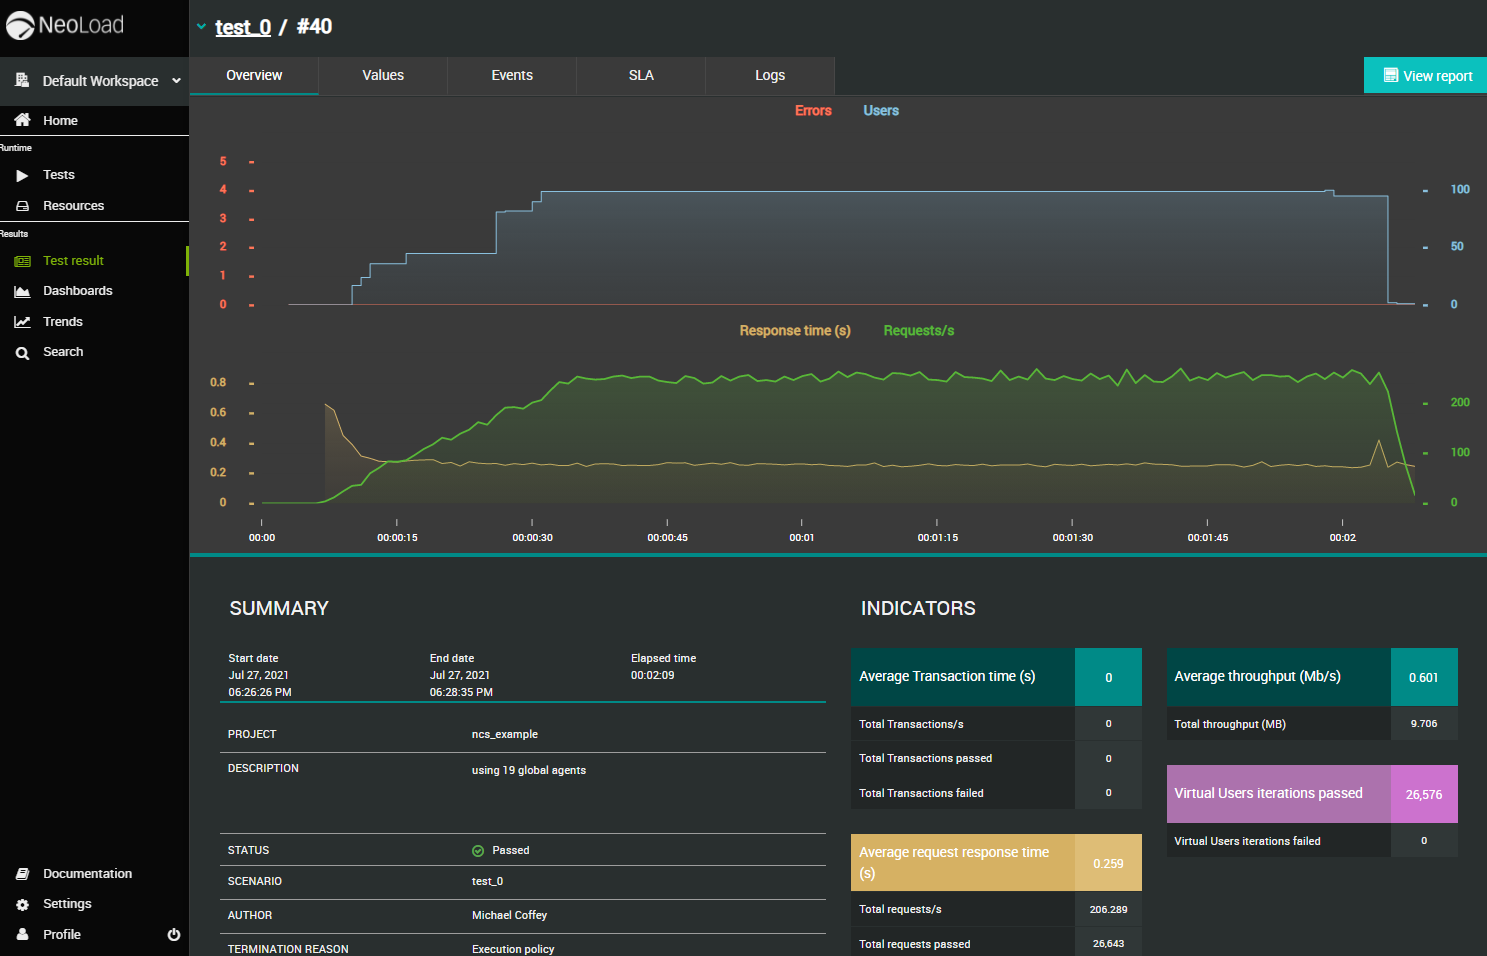
Here is a display of results in NeoLoad Web for 100 Virtual Users on 19 Neocortix Cloud Services instances, for a simple 2-minute test with 30-second ramp-up: